
Stone Wall Builders Near Me: Top 5 Expert Picks 2024
When searching for stone wall builders near me, you’ll find skilled professionals who can improve both the beauty and functionality of your property with stunning stone walls. Whether you’re looking to define your garden, create an eye-catching boundary, or add a rustic accent to your home, finding the right stone wall builder is crucial. Here’s a brief outline of what these experts can do for you:
- Improved Aesthetics: Stone walls offer a timeless beauty that complements any landscape.
- Durability and Longevity: These structures are built to last and require minimal maintenance.
- Versatility: From garden boundaries to retaining walls, the possibilities are endless.
Stone walls are an neat and practical option for homeowners and property managers in Middlesex County, MA. Their historic charm and robustness make them a popular choice for landscape and architectural features. Built without mortar—through the art of dry stone masonry—stone walls stand the test of time, showcasing incredible durability and flexibility. In addition, they are eco-friendly, as they are fully recyclable.

Simple guide to stone wall builders near me terms:
– retaining wall builders near me
– retaining wall stone near me
– retaining walls installers
Understanding Stone Wall Construction
Stone walls have been around for centuries, and for good reason. They blend beauty with practicality, making them a great choice for any property. Let’s explore the basics of stone wall construction, focusing on dry stone masonry, a technique that has stood the test of time.
Dry Stone Masonry
Dry stone masonry is a method of building structures without using mortar. Instead, stones are carefully selected and stacked, relying on gravity and friction to hold everything together. This technique is not just about piling stones; it requires skill and precision to ensure stability and durability.

The Magic of Gravity and Friction
In dry stone masonry, the weight of the stones and the friction between them create a stable structure. This method allows the wall to flex slightly, which is particularly useful in areas prone to ground movement. This flexibility helps prevent cracking and other damage that can occur with rigid construction methods.
Benefits of Dry Stone Walls
- Flexibility: The absence of mortar allows the wall to adapt to changes in the ground, reducing the risk of damage.
- Durability: Well-constructed dry stone walls can last for hundreds of years with little maintenance.
- Maintenance: These walls are easy to repair. If a stone dislodges, it can simply be repositioned without the need for new mortar.
- Recyclability: Dry stone walls are fully recyclable. If a wall needs to be moved or dismantled, the stones can be reused in other projects.
A Timeless Choice
Dry stone masonry is more than just a construction technique; it’s an art form that combines functionality with aesthetic appeal. Whether you’re building a garden wall or a larger retaining structure, the benefits of dry stone masonry make it a compelling choice.
Next, we’ll explore the costs associated with building a stone wall and what factors can influence those costs.
How Much Does It Cost to Build a Stone Wall?
Building a stone wall can be both an investment and an improvement to your property. When considering the cost, several factors come into play, including materials, labor, permits, and additional features like drainage.
Average Cost
The cost of building a stone wall varies widely. On average, you might expect to pay a range that reflects the complexity and materials used in your project. Natural stone walls tend to be on the higher end due to the labor-intensive process and the cost of materials.
Cost Factors
- Materials: The type of stone you choose has a significant impact on cost. Natural stone is often more expensive than manufactured stone veneer. Each has its own aesthetic and durability benefits.
- Labor: Skilled labor is crucial for quality stone wall construction. Labor costs can account for a large portion of the total expense. The expertise required for dry stone masonry, for example, can make this method more costly but results in a longer-lasting wall.
- Permits: Depending on your location, you may need permits for your stone wall. These can add to the overall cost, so it’s wise to check local regulations.
- Drainage: Proper drainage is essential to prevent water damage. Incorporating drainage solutions might increase upfront costs but can save money on repairs in the long run.
- Cost Per Square Foot: The price can also be expressed per square foot or per metre. This varies depending on the factors above and the complexity of the wall design.
Understanding the Investment
While the initial cost may seem significant, a well-built stone wall offers durability and aesthetic appeal that can improve property value. It’s important to budget for all aspects of construction, including potential hidden costs like permits and drainage.
In the next section, we’ll discuss whether building a stone wall is a DIY-friendly project or if it’s best left to the professionals.
Can I Build a Stone Wall Myself?
Building a stone wall yourself can be a rewarding project, but it comes with its own set of challenges and considerations.
DIY Suitability
Stone wall construction isn’t for everyone. It requires time, patience, and some physical strength. If you’re up for a bit of hard work and have a keen eye for detail, you might find it a fulfilling DIY project. However, if precision and structural integrity are not your strong suits, it might be best to hire professionals.
Height Limitations
When considering building a stone wall yourself, it’s important to think about height. DIY stone walls are usually best kept under three feet. Taller walls often require more expertise and may need permits and professional input to ensure they are safe and stable.
Dry-Stack Method
The dry-stack method is a popular choice for DIYers. This method involves stacking stones without using mortar, relying on gravity and friction to hold the wall together. It’s an ancient technique that offers flexibility and easy maintenance. However, it demands careful selection and placement of stones to ensure stability.
No-Mortar Method
Similar to the dry-stack method, the no-mortar approach uses stones without any binding agent. This method is great for creating a rustic look and is environmentally friendly since it doesn’t use cement. It requires a good understanding of stone shapes and how they fit together.
Tools Required
To build a stone wall, you’ll need some essential tools:
- Level: Ensures your wall is straight and even.
- Hammer and Chisel: For shaping stones to fit snugly.
- Shovel: To prepare the foundation.
- Wheelbarrow: For moving stones and materials.
- Gloves and Safety Gear: Protects your hands and body from sharp edges and heavy lifting.
Safety Considerations
Safety should always be a top priority. Stone walls can be heavy and unstable if not properly constructed. Here are some safety tips:
- Lift with your legs, not your back, to avoid injury.
- Wear gloves and sturdy boots to protect against sharp edges and falling stones.
- Ensure the ground is stable before building to prevent shifting and collapse.
- Don’t overreach or lift stones that are too heavy for you.
Building a stone wall yourself can be a satisfying project if you have the right skills and tools. However, for more complex or taller walls, it might be wise to consult with a professional to ensure the job is done safely and effectively.
Next, we’ll explore the top stone wall builders near you and how to find the right contractor for your project.
Top Stone Wall Builders Near You
Finding the right stone wall builders near you can make all the difference in the success of your project. Whether you’re planning a small garden wall or a larger structural feature, choosing a reputable contractor ensures quality and durability.
Finding Contractors
When searching for stone wall builders, start by compiling a list of local contractors. Websites like Bark can be a helpful resource, offering a directory of professionals along with reviews and ratings. You can also ask for recommendations from friends or neighbors who have recently completed similar projects.
Reviews and Quotes
Once you’ve identified potential contractors, take the time to read reviews from past clients. Verified reviews can provide insights into the quality of work and customer satisfaction. For example, Marchi Paving Inc. in Chelmsford, MA, is praised for its high-quality craftsmanship and attention to detail.
Request quotes from multiple builders to compare pricing and services. The cheapest option isn’t always the best. Look for a balance between cost and quality. Most contractors will provide a detailed quote outlining labor, materials, and any additional costs.
Service Areas
It’s essential to choose a contractor who operates in your area. Marchi Paving Inc., for instance, serves a wide range of locations, including Acton, Andover, and Arlington, MA. This ensures that they are familiar with local regulations and environmental conditions, which can impact the construction process.
Bark
Bark is a platform that connects you with local service providers, including stone wall builders. By entering your project details, Bark will match you with professionals in your area. You can then review their profiles, read customer feedback, and request quotes—all in one place. This streamlined process saves time and helps you make an informed decision.
Marchi Paving Inc.
With over 20 years of experience, Marchi Paving Inc. stands out for its commitment to excellence in stone masonry. Their team handles projects from start to finish, ensuring meticulous attention to detail. Whether you’re building a new stone patio or repairing an existing wall, Marchi Paving Inc. has the expertise to meet your needs.
By considering these factors and utilizing resources like Bark, you can find the perfect contractor for your stone wall project. Next, we’ll address some frequently asked questions about stone wall builders to further assist you in making an informed choice.
Frequently Asked Questions about Stone Wall Builders Near Me
When considering building a stone wall, you might have several questions in mind. Let’s address some of the most common ones.
Is it expensive to build a stone wall?
Building a stone wall can vary in cost depending on several factors. Labor costs are a significant part, as skilled masons are required for quality workmanship. The type of stone also impacts the material costs—natural stone is generally more expensive than manufactured options. Additional factors like permits, site preparation, and drainage can also affect the overall expense. It’s crucial to get multiple quotes to understand the cost range for your specific project.
What is a stone wall builder called?
Stone wall builders are known by several names depending on their specialization. Dry stone wallers focus on constructing walls without mortar, relying on the precise placement of stones for stability. Dykers is a term used in some regions for those who build dry stone walls. More generally, these professionals are referred to as stone masons, skilled in various masonry techniques.
Can I build a stone wall myself?
Building a stone wall yourself is possible, but there are limitations to consider. The dry-stack method is a popular DIY approach, allowing you to construct a wall without mortar. However, this method is best suited for walls of limited height due to stability concerns. Safety is paramount, so ensure you have the right tools and knowledge before starting. For larger or more complex projects, hiring a professional is advisable to ensure structural integrity and longevity.
By understanding these aspects, you’ll be better prepared to plan and execute your stone wall project. Whether you decide to DIY or hire a professional, these insights will guide you in making informed decisions.
Conclusion
In summary, building a stone wall can transform your outdoor space, adding both beauty and functionality. Whether you’re looking for a rustic garden wall or a sturdy retaining wall, understanding the construction process and cost factors is crucial.
Choosing the right builder is equally important. A skilled stone mason can ensure your wall is not only aesthetically pleasing but also durable and well-constructed. When selecting a contractor, consider their experience, customer reviews, and the range of services they offer. It’s wise to get multiple quotes to compare prices and services.
At Marchi Paving Inc., we take pride in our high-quality masonry services. With over 20 years of experience, our team is dedicated to executing every project with precision and care. Our use of advanced equipment and in-house project management ensures that each stone wall we build is a masterpiece of craftsmanship and durability.
If you’re searching for stone wall builders near me, look no further. Our team at Marchi Paving Inc. is ready to help you bring your vision to life. Whether you’re in Chelmsford, MA, or any of the surrounding areas, we invite you to explore our hardscaping services and see how we can lift your outdoor space.
Choosing the right builder can make all the difference. Trust our expertise to create a stone wall that stands the test of time and improves your property’s value and appeal.
Build French Drain: 7 Proven Secrets for Success 2024

Build French drain systems to eliminate persistent drainage problems and protect your property from water damage. When water pools around your home or in your yard, it can lead to serious issues like foundation damage, mold growth, and erosion. French drains are a practical and effective solution to redirect water away from these vulnerable areas.
Here’s how to build French drain:
1. Choose the right location with a slight slope.
2. Dig a trench approximately 6 inches wide and 18 to 24 inches deep.
3. Line the trench with water-permeable landscape fabric to prevent soil clogging.
4. Add a layer of gravel, lay down a perforated pipe, and cover with more gravel.
French drains combine simplicity with functionality, offering a versatile approach to keeping your property dry and maintaining its aesthetic appeal. Whether you’re a homeowner or a property manager, understanding the benefits of a French drain can be a game-changer for long-term property care. By channeling water away from at-risk areas, French drains prevent the costly consequences of water damage, ensuring your home or business remains safe and dry.
Build french drain terms explained:
– french drainage systems installation
– drainage trench
– foundation drainage solutions
Planning Your French Drain
Before you build a French drain, it’s crucial to plan the location carefully. The right placement ensures optimal water flow and prevents potential issues down the line.
Location Planning
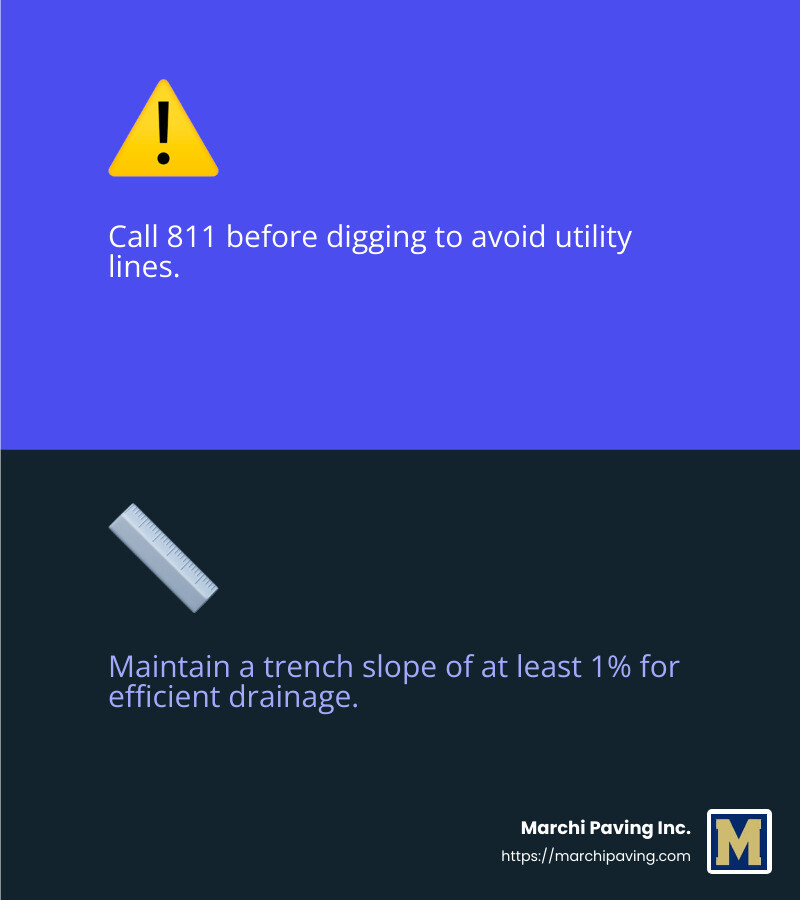
Start by identifying the problem areas where water tends to pool. These are typically low spots in your yard or near your home’s foundation. Ideally, the drain should lead water to a location where it can safely disperse, like a storm drain or a dry well. Make sure the path has a natural downward slope or plan to create one by digging progressively deeper. A slope of at least 1% (a drop of 0.125 inches per foot) is recommended for effective drainage.
Zoning Restrictions
Before breaking ground, check with local authorities about zoning laws and building codes. Some areas have specific regulations regarding drainage systems, especially if you’re near wetlands or other sensitive environments. Contact your local zoning office or homeowners association to ensure compliance. Directing water onto a neighbor’s property is almost always illegal and can lead to disputes or legal action.
Utility Lines
Safety first! Call 811 a few days before you dig to have underground utility lines marked. This free service is essential to avoid damaging municipal pipes, cables, or other underground installations. Knowing the layout of these utilities not only prevents accidents but also ensures that your French drain won’t interfere with existing infrastructure.
Additional Tips
- Consider Professional Help: If you’re unsure about the best location or have a complex property layout, hiring a surveyor or drainage professional can provide valuable insights.
- Neighbor Considerations: Ensure your drainage plan doesn’t negatively impact neighboring properties, as this could lead to disputes.
With a well-thought-out plan, your French drain will effectively manage water runoff and protect your property from potential damage.
Next, let’s dig into the step-by-step process of building a French drain.
How to Build a French Drain
Building a French drain is a practical solution to manage water runoff and prevent water damage. With the right materials and careful planning, you can tackle this project yourself.
Choosing Materials
When you build a French drain, selecting the right materials is crucial for its effectiveness and longevity.
- Perforated Pipe: Opt for a high-quality perforated PVC pipe. This type of pipe allows water to enter from all sides, ensuring efficient drainage.
- Gravel Bedding: Use clean, large gravel or landscaping stone for the bedding. This supports the pipe and facilitates water flow.
- Filter Fabric: Line the trench with water-permeable filter fabric. This prevents dirt and roots from clogging the pipe, maintaining the system’s efficiency over time.
Digging the Trench
Once you’ve gathered your materials, it’s time to dig the trench. Proper trench dimensions and slope are key to a successful French drain.
- Trench Dimensions: Aim for a trench that is about 18 inches deep and 9 to 12 inches wide. This size is generally sufficient for most yard drainage needs.
- Slope Requirements: Ensure the trench has a slope of at least 1% (1 inch of drop per 10 feet of pipe). This slope allows gravity to carry water away efficiently.
- Safety Precautions: Before you start digging, call 811 to mark underground utility lines. This step is vital to avoid damaging any existing infrastructure.
- Trencher Rental: For larger projects, consider renting a trencher. This tool makes digging easier and more efficient. It’s a great option if you want to save time and effort.
By following these guidelines, you can effectively build a French drain that will manage water runoff and protect your property from water damage. Next, we’ll cover the installation process, including how to connect the pipe and cover it with gravel.
Installing the French Drain System
When you’re ready to install your French drain, it’s important to focus on the details that ensure its effectiveness. Here’s how to get it right.
Pipe Connections and Inlet Grate
Start by connecting your pipe system. Use as many fittings as needed to extend from the inlet grate to the water outlet point. The inlet grate should be placed where water pools most often. This will ensure that the drain captures the maximum amount of runoff.
Gravel Covering
Once the pipe is laid in the trench, cover it with about 3 inches of gravel or crushed stone. Make sure the gravel doesn’t rise above ground level. This layer supports the pipe and helps with water filtration. Wrap any excess filter fabric over the gravel for added protection.
Alternative Systems: Gravel-Free Options
If you want to simplify the process, consider using a gravel-free drainage system. These systems use a corrugated pipe surrounded by polystyrene aggregate and are wrapped in filter fabric. This option eliminates the need for gravel and filter fabric installation, making it a quicker solution.
This gravel-free system can be particularly helpful if you’re looking to save time and effort. Just follow the manufacturer’s instructions, place the product in the trench, and cover it with soil.
By choosing the right method and materials, you can ensure your French drain system is effective and long-lasting. Next, we’ll dive into maintenance and troubleshooting to keep your system running smoothly.
Maintenance and Troubleshooting
A well-installed French drain is a great start, but keeping it functional requires regular maintenance. Here’s how to ensure your system stays in top shape.
Regular Inspection
Inspect your French drain at least once a year. Look for signs of water pooling or soggy areas in your yard, which can indicate a problem. A quick check can save you from bigger issues down the line.
Cleaning the Inlet Grate
The inlet grate is your drain’s first line of defense. Over time, it can get clogged with leaves, dirt, and debris. Clean it regularly to keep water flowing freely. Simply remove any visible debris by hand or with a garden hose. A clean grate ensures maximum water capture and prevents blockages further down the system.
Fixing Clogs
Clogs can happen, even with the best maintenance. If you suspect a blockage, test the system by pouring water into the inlet grate. If water doesn’t flow out of the outlet pipe, it’s time to investigate.
- Locate the Clog: Use cleanout access points if available. These are small openings that allow you to access the pipe without digging.
- Flush the System: A garden hose can often clear minor clogs. Insert it into the inlet grate and let the water pressure do the work.
- Professional Help: For stubborn clogs, you might need professional tools or assistance. Marchi Paving Inc. can provide expert help to get your drain back in working order.
Regular upkeep is key to a long-lasting French drain. By staying on top of maintenance, you’ll keep your yard dry and your drainage system efficient.
Next, let’s tackle some frequently asked questions about French drains to clear up any lingering doubts.
Frequently Asked Questions about French Drains
Can you build a French drain yourself?
Yes, you can build a French drain yourself, but it requires careful planning and the right tools. A DIY installation can save money, but be prepared for some hard work. You’ll need basic equipment like a shovel, level, and possibly a trencher for digging the trench. Remember to call 811 before you dig to check for underground utility lines.
How deep must a French drain be?
The depth of your French drain depends on its purpose. For general yard drainage, a trench should be about 18 inches deep. If you’re addressing more significant water issues, like basement flooding, the trench might need to be deeper, reaching the footing level of your foundation. Always ensure the trench has a slope of at least 1% (1 inch drop per 10 feet of pipe) for proper water flow.
Where not to put a French drain?
Avoid installing a French drain in areas with high water tables, as it might not work effectively. You should also steer clear of placing drains where they could redirect water to a neighbor’s property, which could cause disputes or legal issues. Be aware of local zoning restrictions, as some areas have rules about where you can install drainage systems. Always direct water away from your home’s foundation to prevent damage.
Conclusion
At Marchi Paving Inc., we understand the crucial role that effective drainage solutions play in protecting your property from water damage. Whether you’re dealing with a soggy lawn or aiming to prevent basement flooding, our team is equipped to deliver high-quality French drain installations custom to your specific needs.
Our experience in drainage solutions ensures that every project is executed with precision and efficiency. We use advanced equipment to guarantee that your French drain system is both effective and durable, providing long-term peace of mind.
Choosing Marchi Paving Inc. means partnering with a team dedicated to excellence. Our commitment to quality and customer satisfaction sets us apart. We focus on in-house project execution, allowing us to maintain control over every aspect of the installation process. This approach ensures that we meet our high standards and deliver outstanding results for every client.
Ready to safeguard your landscape and home from water damage? Contact us today to learn more about our comprehensive drainage solutions and how we can help you achieve a dry and beautiful property.
Asphalt Resurfacing Near Me: Top 3 Proven Benefits
Asphalt resurfacing near me is a way to revive your worn-out driveways and parking lots without the need for a complete overhaul. If you’re looking to extend the life of your pavement while keeping costs manageable, resurfacing might be the solution you’re seeking. With asphalt resurfacing, not only do you improve the appearance of your surfaces, but you also boost their durability against the elements and heavy use.
Why consider asphalt resurfacing? Let’s break it down:
- It’s often more cost-effective than full replacement. You get a fresh surface at a fraction of the cost.
- Resurfacing improves durability, adding years to your pavement’s lifespan.
- It provides a quick facelift, instantly boosting curb appeal and property value.
Marchi Paving Inc. understands that maintaining property accessibility and safety is crucial, especially for commercial property owners and homeowners. With locations across Middlesex County, MA, Marchi Paving offers local expertise for both residential and commercial needs. Trust skilled professionals to ensure your project completes on time, keeping your property accessible throughout.

Handy asphalt resurfacing near me terms:
– asphalt contractor near me
– cost of driveway paving
– paving driveway
Understanding Asphalt Resurfacing
Asphalt resurfacing is a practical method to revitalize your pavement. It involves applying a new layer of asphalt over the existing surface. This process is called an overlay. The overlay can be an asphalt overlay or a slurry seal, depending on the condition of your current pavement and your specific needs.
Overlay
An asphalt overlay adds a fresh layer of asphalt, typically 1 to 3 inches thick, to the existing surface. This approach is ideal for pavements that are structurally sound but have surface damage. Before laying the new asphalt, the surface is often milled to ensure a smooth and even application.
A slurry seal, on the other hand, is a thinner layer—about ¼ inch thick—composed of asphalt emulsion, sand, and rock. It’s a cost-effective option for maintaining roads in good condition, offering a durable surface that addresses minor surface distress.
Installation
The installation process is straightforward but requires expertise to ensure quality results. First, any necessary milling is done to remove the old surface and prepare it for the new layer. Next, the new asphalt is applied, compacted, and smoothed to create a seamless finish. Proper installation is crucial for maximizing the pavement’s lifespan.
Maintenance
Regular maintenance is key to extending the life of your resurfaced asphalt. This includes routine cleaning to remove debris and prevent damage, crack sealing to stop water infiltration, and sealcoating every two to three years to protect against UV rays and environmental wear.

Longevity
With proper installation and maintenance, resurfaced asphalt can last for many years. The new surface is designed to withstand traffic and weather, providing a fresh, durable layer that can extend the life of your pavement by 10 to 15 years or more.
By choosing asphalt resurfacing near me, you not only improve the appearance and functionality of your pavement but also ensure a long-lasting solution that is both economical and efficient.
Asphalt Resurfacing Near Me: What to Consider
When you’re on the hunt for asphalt resurfacing near me, there are several important factors to keep in mind. From selecting the right local contractors to understanding cost implications and location-specific considerations, making an informed choice ensures a smooth and successful project.
Local Contractors
Choosing a local contractor is crucial. They are familiar with the specific challenges and regulations in your area. Local contractors often have established reputations and can provide references from nearby projects. This local expertise helps ensure that the resurfacing meets both your expectations and local standards.
Service Quality
Quality of service is a top priority. Look for contractors with a proven track record and positive customer feedback. Check their project portfolio for examples of similar work. High-quality service includes not just the resurfacing itself, but also customer service and post-installation support.
Tip: Look for contractors who use modern equipment and techniques, as these can improve the quality and durability of the resurfaced asphalt.
Cost
While cost is a significant factor, it’s important to balance price with quality. Obtain multiple quotes to compare. Ensure that each quote provides a detailed breakdown of costs, including materials, labor, and any additional services. Be wary of unusually low quotes, which might indicate lower quality materials or workmanship.

Location-Specific Factors
Your location can influence the resurfacing process. Climate conditions, such as temperature fluctuations and precipitation, can affect the type of materials and methods used. For instance, porous asphalt might be a good choice in areas with heavy rainfall due to its water-absorbing properties.
Additionally, local regulations may require specific permits or adherence to environmental standards. A knowledgeable contractor will steer these requirements efficiently, ensuring compliance and minimizing delays.
By considering these factors, you can find the best asphalt resurfacing near me that not only meets your needs but also provides a durable and aesthetically pleasing result.
Top Benefits of Asphalt Resurfacing
Asphalt resurfacing offers numerous advantages that make it a popular choice for driveways, roads, and parking lots. Let’s explore some of the top benefits:
Durability
One of the standout benefits of asphalt resurfacing is its durability. Asphalt is tough and built to last, handling heavy traffic and harsh weather with ease. With proper maintenance, resurfaced asphalt can last many years, providing a reliable surface that stands the test of time. This longevity makes it a cost-effective solution compared to full replacement.
Appearance Improvement
Resurfacing not only strengthens the pavement but also significantly improves its appearance. A fresh layer of asphalt gives surfaces a smooth, clean look, instantly boosting curb appeal. This is particularly important for homeowners looking to increase property value or businesses aiming to create a welcoming environment for customers.
Eco-Friendly Options
Choosing eco-friendly options in asphalt resurfacing can make a big difference for the environment. Materials like perpetual pavement and porous asphalt are designed to be sustainable. Perpetual pavement uses recycled materials, reducing waste and conserving resources. Porous asphalt allows water to seep through, helping recharge groundwater and reducing runoff.
These green options not only contribute to environmental sustainability but also offer practical benefits like improved drainage and reduced urban heat. Opting for eco-friendly resurfacing methods can improve the lifespan of the pavement and promote a healthier environment.
By prioritizing durability, appearance, and eco-friendly practices, asphalt resurfacing provides a comprehensive solution that meets both practical and aesthetic needs.
Frequently Asked Questions about Asphalt Resurfacing
Is it better to resurface or replace an asphalt driveway?
When deciding whether to resurface or replace an asphalt driveway, several factors come into play. Resurfacing is generally more cost-effective and quicker than a full replacement. It involves adding a new layer of asphalt over the existing surface, which can extend the life of your driveway by 8-15 years if the base is still in good condition.
Replacement is necessary if the underlying foundation is damaged. This process involves removing the old asphalt and fixing the base before laying new asphalt. While more expensive, replacement ensures a new, stable surface that can last up to 30 years.
Consider the extent of damage, budget, and long-term plans for your property when making this decision.
How long does asphalt resurfacing last?
The longevity of asphalt resurfacing largely depends on installation quality and ongoing maintenance. A well-installed resurfaced driveway can last between 8 to 15 years.
To maximize lifespan, follow these maintenance tips:
- Sealcoating every 2-3 years protects against water and UV damage.
- Crack filling prevents small issues from becoming bigger problems.
- Regular cleaning removes debris and prevents staining.
Quality installation and proactive maintenance are key to extending the life of your resurfaced asphalt.
Can you put new asphalt over old asphalt?
Yes, you can put new asphalt over old asphalt through a process called overlay. This involves applying a new asphalt layer over the existing surface. Before overlaying, the old surface should be cleaned and any cracks or potholes repaired. This preparation ensures a smooth, durable finish.
Overlaying is a cost-effective method to refresh the driveway without the expense of full replacement. However, if the old asphalt has significant foundational issues, it’s better to consider a complete replacement.
By understanding these factors, you can make informed decisions about your asphalt resurfacing needs and ensure a long-lasting, attractive surface.
Conclusion
When it comes to asphalt resurfacing near me, choosing the right contractor is crucial. At Marchi Paving Inc., we pride ourselves on our expertise and commitment to high-quality execution. With over 20 years of experience, we’ve honed our skills to deliver the best results for our clients.
High-Quality Execution
Our approach to paving is meticulous and thorough. We use only premium materials to ensure that your resurfaced asphalt stands the test of time. Whether it’s a residential driveway or a commercial parking lot, our team handles every project with precision and care. This dedication to quality means that you get a surface that’s not only durable but also aesthetically pleasing.
Advanced Equipment
We invest in state-of-the-art equipment to improve the efficiency and precision of our work. This advanced machinery allows us to complete projects on schedule and within budget, without compromising on quality. Our equipment ensures a smooth, durable finish that looks great and performs well.
By choosing Marchi Paving Inc., you’re not just getting a contractor; you’re partnering with a team dedicated to delivering outstanding results. We’re deeply rooted in the local community and understand the specific needs and challenges of the area. Our local expertise ensures that your asphalt resurfacing project is custom to withstand the local climate and conditions.
Ready to start your project? Contact Marchi Paving Inc. today to experience the Marchi Paving difference. Let us pave the way to a smoother, more durable surface for your property.
Commercial Snow Plow Cost: Top 5 Proven Strategies 2024
Commercial snow plow cost is a critical consideration for property managers and business owners seeking to maintain safe and accessible premises during winter months. Whether it’s clearing parking lots, driveways, or walkways, reliable snow removal services are essential for ensuring business continuity and safety. Key factors influencing these costs include the type of service required, geographical location, and the equipment used.
In regions like Middlesex County, MA, where snow can accumulate quickly and unpredictably, the demand for dependable snow plowing services is high. This creates a competitive market but also underscores the importance of selecting a service provider who balances cost with quality. Safety is paramount; timely snow removal is crucial to minimize slip-and-fall accidents and other hazards that could lead to costly liabilities.
As you steer your options, choosing a professional service involves more than just pricing. It involves understanding how decisions about equipment, labor, and contracts impact your overall expenses.

Easy commercial snow plow cost word list:
– commercial plowing service
– commercial sidewalk snow removal
– snow removal service
Understanding Commercial Snow Plow Costs
When it comes to commercial snow plow cost, several elements come into play. For businesses, profitability is about more than just keeping costs low. It’s about ensuring safety and accessibility, which can prevent costly liabilities.
Profitability
Snow removal is not just about clearing snow; it’s about maintaining business operations. A well-executed snow removal plan can keep your doors open and customers safe. This translates to sustained revenue during harsh winters. While costs can be significant, the return on investment often justifies the expense, especially in high-snowfall areas like Middlesex County, MA.
Pricing Formula
Calculating the costs for snow plowing involves a mix of fixed and variable components.
- Service Scope: The size and complexity of the area to be cleared directly affect pricing. Larger lots or areas with complex layouts require more resources.
- Equipment and Labor: Different jobs require different tools. A simple sidewalk might need just a snow blower, while a large commercial lot might need heavy-duty plows and more manpower.
- Geographical Location: Areas with frequent snowfalls might have higher costs due to increased demand and operational challenges.
- Technology Use: Advanced systems like real-time weather data and GPS mapping can optimize operations but may require an initial investment.
Liability
Liability is a crucial factor. If a property isn’t cleared properly, it can lead to accidents, which in turn can lead to lawsuits. Hiring a professional service can mitigate these risks. A reliable provider will have the necessary insurance to cover any accidents that occur on your property due to snow or ice. This protection is invaluable and often justifies the investment in professional services.
Understanding these elements can help you make informed decisions about your snow removal needs. Balancing cost, safety, and reliability is key to managing commercial snow plow costs effectively.
Key Factors Influencing Snow Plow Costs
When assessing commercial snow plow cost, several key factors play a significant role in determining the overall expenses. Let’s break down these factors to help you understand what affects pricing.
Service Scope
The scope of the service is a primary determinant of cost. It involves the size and complexity of the area that needs clearing. For instance, a sprawling parking lot will require more time and resources compared to a small driveway. Areas with intricate layouts, such as those with tight corners or multiple entrances, often need specialized equipment and additional manpower.
Equipment Costs
Equipment is a significant expense in snow removal. From snow blowers to heavy-duty plow trucks, each piece of equipment comes with costs for maintenance, fuel, and depreciation. The choice between manual, electric, and hydraulic plows can also influence expenses. Hydraulic plows, for example, provide precise control but are more costly compared to manual options.
Labor Costs
Labor is another crucial factor. The intensity and duration of a snow event directly impact labor costs. More severe weather requires longer hours and possibly more workers. Additionally, skilled operators for advanced equipment might command higher wages.
Geographical Location
Your geographical location can affect snow plow costs significantly. Areas with heavy snowfall, like Middlesex County, MA, often see higher demand for snow removal services. This increased demand can lead to higher costs. Moreover, specific regional regulations, such as licensing requirements, can add to the expenses.
Technology Use
Incorporating technology can streamline operations and improve efficiency. Tools like GPS mapping and real-time weather forecasts allow for precise planning and resource allocation. While these technologies may require an upfront investment, they can reduce long-term costs by optimizing routes and minimizing wasted effort.
By understanding these factors, businesses can better manage their snow removal budgets and ensure they receive value for their investment. Balancing service scope, equipment, labor, location, and technology is essential for effective cost management in commercial snow plowing.

Next, let’s explore different pricing models available for snow removal services.
Pricing Models for Snow Removal Services
When it comes to determining the commercial snow plow cost, choosing the right pricing model is crucial. Let’s explore the three main types: pay-per-push, seasonal contracts, and cost per square foot.
Pay-Per-Push
Pay-per-push is a flexible pricing model where clients pay each time a snow removal service is performed. This model benefits contractors during winters with frequent snowfalls, as payments directly reflect the amount of work done. It’s a great option for businesses that prefer to pay only when services are needed. However, it can lead to unpredictable costs for clients, especially in regions with variable snowfall.
Seasonal Contracts
With seasonal contracts, clients pay a fixed price for snow removal services throughout the winter season. This model offers predictability, allowing businesses to budget more effectively. Contractors receive a steady income stream, which can help cover operational costs even during milder winters. The challenge lies in accurately pricing these contracts to cover potential heavy snowfall without incurring losses.
Cost Per Square Foot
Another common approach is charging based on the cost per square foot. This model considers the size of the area to be cleared. It’s straightforward and allows for easy comparison between different service providers. Costs can vary significantly depending on factors like the frequency of snowfall, the complexity of the area, and additional services like de-icing or snow relocation.
Each pricing model has its pros and cons, and the best choice depends on the specific needs and risk tolerance of the client. By understanding these models, businesses can select the most suitable option for their snow removal requirements, ensuring they get the best value for their investment.
Next, we’ll dive into the tools and technology that are changing snow removal services.
Tools and Technology in Snow Removal
In snow removal, technology is a game-changer. It helps contractors work smarter, not harder. Here are some key tools and technologies that are changing the industry:
Real-Time Weather Data
One of the most significant advancements in snow removal is access to real-time weather data. This allows contractors to plan their operations with precision. By knowing exactly when and where snow will fall, they can allocate resources efficiently. This proactive approach not only saves time and money but also improves safety for both workers and clients.
GPS Mapping
GPS mapping is another tool in the snow removal industry. It helps contractors accurately estimate the plowable square footage of a property. With GPS mapping, they can easily identify plowable areas versus non-plowable ones, such as landscaped regions. This technology ensures that estimates are accurate, leading to fair pricing and avoiding potential profit losses.
Frost Solutions
Technologies like Frost Solutions bring a competitive edge to snow removal businesses. These systems provide location-specific weather forecasts, allowing contractors to anticipate snow events at specific sites. By doing so, they can adjust their operations and pricing models in real-time. Frost Solutions helps increase margins by ensuring that teams don’t over-treat or service sites unnecessarily, optimizing resource allocation.

These tools and technologies not only improve operational efficiency but also build trust with clients. By providing transparent and accurate service proposals, contractors can ensure customer satisfaction and loyalty.
Next, we’ll answer some frequently asked questions about commercial snow plow costs.
Frequently Asked Questions about Commercial Snow Plow Costs
Is snow plowing profitable?
Profitability in snow plowing depends on several factors, including demand, pricing models, and efficient resource management. During winters with heavy snowfall, demand for snow removal services increases, often leading to higher profits. However, profitability can be unpredictable in milder winters where less snow means fewer opportunities for work.
To maximize profitability, contractors often choose between different pricing models, like pay-per-push or seasonal contracts. Pay-per-push contracts can be more lucrative during snowy winters, while seasonal contracts offer steady income regardless of snowfall. Each model has its risks and rewards, so understanding market trends and client needs is crucial.
How do you calculate snow plowing costs?
Calculating commercial snow plow cost involves a mix of art and science. Contractors need to consider several cost factors:
- Service Scope: Services range from driveway clearing to large commercial lots, and each requires different equipment and labor.
- Equipment and Labor Costs: The type of equipment (e.g., snow blowers vs. heavy-duty plows) and the number of workers needed can significantly affect costs. Plows that relocate snow are typically more expensive.
- Overhead Costs: These include equipment maintenance, fuel, insurance, and office expenses.
- Geographical Location: Areas with frequent snow events might have higher costs due to increased demand and operational challenges.
- Use of Technology: Investing in technologies like GPS mapping and real-time weather data can optimize resource allocation, reducing unnecessary deployments and costs.
Balancing these factors ensures that contractors cover their expenses while maintaining a reasonable profit margin.
Why is snow plowing insurance so expensive?
Insurance for snow plowing businesses can be costly, primarily due to the high liability risks involved. Snow removal is a hazardous job, with potential for accidents like slips and falls on icy surfaces. If a contractor is found liable for an accident, the financial implications can be significant.
To mitigate these risks, insurance policies for snow plow businesses often include general liability and commercial auto coverage. The costs of these policies reflect the heightened risk of property damage or personal injury claims. For instance, general liability insurance can cost anywhere from $400 to $1,000 per year, while a commercial auto policy might add another $900 annually.
Having comprehensive insurance not only protects the contractor’s business but also provides peace of mind to clients, knowing that any potential damages will be covered. This is a critical component in maintaining trust and credibility in the industry.
Next, we’ll conclude by highlighting Marchi Paving Inc.’s commitment to high-quality service and advanced equipment.
Conclusion
At Marchi Paving Inc., we pride ourselves on delivering high-quality service and utilizing advanced equipment to meet the diverse needs of our clients. With over 20 years of experience in Chelmsford, MA, and the surrounding areas, our team is dedicated to ensuring that your commercial snow removal needs are handled efficiently and effectively.
High-Quality Service
We understand that every snow event is unique, requiring a custom approach to ensure safety and accessibility. Our team is committed to providing reliable and responsive service, ensuring that your property is cleared promptly and thoroughly. By maintaining strict quality control and using only the best materials, we ensure that our work stands up to the harshest winter conditions.
Advanced Equipment
Our investment in state-of-the-art equipment allows us to perform snow removal tasks with precision and speed. From heavy-duty plows to advanced weather monitoring solutions, we leverage technology to optimize our operations. This means fewer unnecessary deployments and more efficient resource allocation, ultimately saving you time and money.
Choosing Marchi Paving Inc. for your commercial snow removal needs means partnering with a team that values quality, safety, and customer satisfaction. Our expertise and commitment to excellence make us a trusted choice for businesses across the region.
Ready to experience the Marchi Paving difference? Contact us today to learn more about our services and how we can help keep your property safe and accessible all winter long.
Septic Excavation Companies Near Me: Top 5 Trusted 2024
When seeking septic excavation companies near me, it’s crucial to find reliable and professional service providers who can manage your septic system installation with expertise and efficiency. For property managers and homeowners in Middlesex County, MA, the choice of the right company can make the process smoother and stress-free. Here’s what you need to know upfront:
- Choose a licensed and insured contractor: Ensures quality and compliance with local regulations.
- Check customer reviews: Reliable reviews can guide you to trusted and experienced professionals.
- Understand the services offered: Look for companies that provide comprehensive services like septic tank installation and maintenance.
Understanding these factors will help you in identifying the right septic excavation company for your needs.
A septic system is a critical component of any property, ensuring the safe and efficient processing of wastewater. Septic system installation involves expert knowledge in tank placement and drain field construction. Each project requires detailed excavation services to properly prepare the site for long-lasting performance.
Local contractors, like those in Middlesex County, bring a unique advantage. They understand the specific soil and environmental conditions, ensuring that the installation meets both local codes and personal needs. Whether you’re managing a commercial property or a residential home, investing in a good septic system is vital for maintaining property value and functionality.

Terms related to septic excavation companies near me:
– residential excavation companies near me
– excavator service near me
– hydrovac excavation companies near me
Understanding Septic Systems
When it comes to septic systems, understanding the different types and their associated costs can make a big difference in choosing the right solution for your property. Let’s explore the basics of septic systems and what you should know before making a decision.
Types of Septic Systems
Anaerobic Systems
Anaerobic septic systems use bacteria that do not require oxygen to break down waste. They are a common choice for many homeowners due to their simplicity and lower installation costs. However, they require a larger area of land because they rely on natural soil filtration.
Aerobic Systems
Aerobic systems, on the other hand, introduce oxygen into the tank to support bacteria that process waste more efficiently. This type of system is often more expensive to install because it involves additional components like aerators. Despite the higher cost, aerobic systems can be a good option for properties with limited space since they allow for a smaller drain field.
Evapotranspiration Systems
Evapotranspiration systems are less common but can be ideal in arid regions. These systems use a combination of evaporation and plant absorption to treat wastewater. They require careful design and maintenance to function effectively, making them suitable for specific environmental conditions.
Mound Systems
Mound systems are a type of septic system where the drain field is built above ground in a mound of sand. This setup is often used in areas with high water tables or shallow soil depths. Although mound systems can be more costly to install, they provide a viable solution when traditional systems are not feasible.
Cost Factors
Installation Costs
The cost of installing a septic system can vary widely depending on the type of system and the specific needs of your property. For example, anaerobic systems tend to be on the lower end of the cost spectrum, while aerobic and mound systems can be more expensive due to their complexity and the materials required.
Repair Costs
Septic system repairs can also range in cost depending on the issue. Common repairs, like replacing a filter, may be relatively inexpensive, while more extensive repairs, such as fixing damaged pipes, can be costly. Regular maintenance can help prevent major repairs and extend the life of your system.
Maintenance Costs
Routine maintenance is crucial for the longevity of any septic system. This includes regular pumping and inspections to ensure everything is functioning correctly. The frequency and cost of maintenance will depend on factors like household size and water usage. It’s important to budget for these ongoing expenses to avoid unexpected breakdowns.
Understanding the types of septic systems and their associated costs helps you make informed decisions about your property’s wastewater management needs. Whether you’re considering an anaerobic system for its affordability or a mound system for challenging soil conditions, knowing these basics will guide you in choosing the right option.
How to Choose a Reliable Septic Excavation Company
Choosing a reliable septic excavation company is crucial for ensuring that your septic system is installed or repaired correctly. Here are some key factors to consider:
Licensing and Insurance
Licensing Requirements
When selecting a septic excavation company, always verify that they hold the necessary licenses. Most states, including Maryland, require septic tank installers to be licensed. This ensures that the company complies with local regulations and standards, reducing the risk of poor-quality work or code violations.
Insurance Coverage
Insurance is another critical factor. A reputable company should have comprehensive insurance coverage to protect against potential liabilities during the project. This includes worker’s compensation and general liability insurance. Confirming insurance coverage can provide peace of mind, knowing that you won’t be financially responsible for any accidents or damages that might occur on your property.
Customer Reviews and Testimonials
Verified Reviews
Customer reviews are invaluable for assessing a company’s reliability. Platforms like Angi and HomeAdvisor offer verified reviews from homeowners who have used these services. Look for companies with consistently high ratings and positive feedback.
Angi and HomeAdvisor Ratings
These ratings can give you a clear picture of a company’s performance. For instance, an “Angi Certified” business has met specific standards, including passing a criminal background check, holding the necessary licenses, and maintaining a good average star rating.
“Happy customers are a strong indicator of quality service.” – Carolina Dozer Promise
Reading both positive and negative reviews can provide a balanced view of what to expect from a company. Prioritize companies with a track record of excellent customer service and satisfaction.
By focusing on licensing, insurance, and customer reviews, you can find a reliable septic excavation company near me that meets your needs and ensures a successful project.
Next, we’ll explore the top services offered by septic excavation companies, including septic tank installation, leach field installation, and septic tank pumping.
Top Services Offered by Septic Excavation Companies
When it comes to septic excavation companies near me, there are three primary services that stand out: septic tank installation, leach field installation, and septic tank pumping. Each service plays a crucial role in maintaining a functional and efficient septic system.
Septic Tank Installation
Installation Process
The installation of a septic tank involves several key steps. First, a thorough site assessment is conducted to determine the best location for the tank. This is followed by excavation, where the ground is prepared to house the tank. The tank is then carefully placed and connected to the home’s plumbing system. Finally, the area is backfilled and leveled.
Materials Used
Septic tanks are typically made from concrete, fiberglass, or plastic. Each material has its pros and cons. Concrete tanks are durable but require more maintenance. Fiberglass and plastic tanks are resistant to corrosion and tend to last longer.
Design Considerations
When designing a septic system, factors like soil composition, water table levels, and household size are considered. These elements influence the type and size of the septic tank needed.
Leach Field Installation
Design Considerations
The design of a leach field, also known as a drain field, is crucial for the proper treatment of wastewater. It involves installing a network of pipes that allow effluent to filter through the soil. The design must account for soil type, slope, and vegetation to ensure efficient drainage and prevent contamination.
Maintenance Tips
To maintain a healthy leach field, avoid planting trees or shrubs nearby, as roots can damage pipes. Regularly inspect the area for signs of saturation, such as standing water or foul odors, which could indicate a problem.
Septic Tank Pumping
Frequency
Septic tank pumping is essential to prevent system backups and failures. Most systems need pumping every three to five years, but this can vary based on household size and water usage.
Benefits
Regular pumping helps extend the life of your septic system by removing sludge that can clog the tank and pipes. It also reduces the risk of costly repairs and environmental contamination.
By understanding these core services, homeowners can make informed decisions about their septic system needs and ensure they choose the right septic excavation company near me for the job.
Frequently Asked Questions about Septic Excavation Companies Near Me
How much does a sand mound septic system cost in the local area?
In the local area, the cost of a sand mound septic system typically ranges from $10,000 to $20,000. This type of system is often necessary in regions with high water tables or shallow soil depths, where traditional in-ground systems aren’t feasible. The sand mound system lifts the drain field, allowing for proper filtration and preventing groundwater contamination. It’s essential to consult with a professional to determine if this system suits your property’s specific needs.
Can a homeowner install a septic system in the local area?
Installing a septic system in the local area is not a simple DIY project. Homeowners are required to obtain a septic system construction permit before installation. Additionally, specific licensing requirements must be met to ensure the system is installed correctly and complies with local regulations. It’s crucial to work with a licensed professional to avoid potential legal issues and ensure the system functions efficiently.
What is the cheapest septic system to install?
Anaerobic septic systems are generally the most cost-effective option for homeowners. These systems are simpler and less expensive to install compared to aerobic systems. They rely on natural processes to break down waste without the need for additional oxygen. While anaerobic systems are budget-friendly, they may not be as efficient in treating wastewater as other systems, particularly in areas with challenging soil conditions. It’s important to weigh the initial savings against long-term efficiency and maintenance costs when choosing a septic system.
Conclusion
At Marchi Paving Inc., we pride ourselves on delivering high-quality services in septic excavation and installation. With over 20 years of experience, we have honed our expertise to ensure that every project is completed with precision and care. Our commitment to excellence is evident in the advanced equipment we use, which allows us to tackle even the most challenging excavation tasks efficiently and effectively.
Our team of skilled professionals understands the complexities involved in septic system projects. Whether you’re looking to install a new septic tank or need assistance with a leach field, we have the knowledge and tools to get the job done right. We prioritize customer satisfaction and strive to exceed expectations every step of the way.
Choosing the right company for your septic excavation needs is crucial. At Marchi Paving Inc., we offer a comprehensive range of services that ensure your septic system is installed and maintained to the highest standards. Our dedication to quality and customer service makes us a reliable partner for your excavation projects.
Ready to experience the Marchi Paving difference? Explore our services and see how we can assist you with your next project.
Water and Sewer Line Repairs: Top 3 Quick Solutions
Water and sewer line repairs are essential for maintaining the health and functionality of any property. If you’re facing issues with your water or sewer line, finding a reliable repair service quickly can save you from costly damages and inconvenience. Here’s a quick start guide:
- Identify the Issue: Determine if it’s a water line or sewer line problem.
- Check Local Listings: Use online directories or local contractors specializing in emergency repairs.
- Prioritize Safety: Ensure the affected area is safe until professionals arrive.
- Get Multiple Quotes: For the best service and price, contact several specialists.
Whether you’re a homeowner or managing a commercial property, addressing water and sewer line issues promptly is crucial. Many different obstacles can arise from leaking or broken lines. These can range from disrupting daily routines to posing serious health and structural risks.
Avoid the stress of unexpected repairs by understanding the types of issues that can occur and knowing how to find skilled experts fast. You’ll learn how to manage your repair needs efficiently and effectively, ensuring your property remains safe and functional.

Water and Sewer Line Repairs terminology:
– repair sewer line
– trenchless sewer line repair
– sewer line from house to street
Understanding Water and Sewer Line Repairs
When it comes to water and sewer line repairs, it’s crucial to understand the challenges and solutions involved. Knowing the basics can help you make informed decisions and avoid unnecessary expenses.
Service Line Repair
Service lines are the pipes that connect your property to the main water or sewer line. These lines are vital for delivering water to your home and carrying waste away. Over time, they can develop issues like leaks, clogs, or breaks. Common causes include aging pipes, tree root intrusion, or shifting ground.
When you notice problems such as low water pressure, wet spots in your yard, or unusual noises, it’s time to consider a service line repair. This process might involve fixing a specific section of the pipe or replacing it entirely, depending on the extent of the damage.
Sewer Line Replacement
A sewer line replacement is often necessary for older properties or those with clay pipes. Clay pipes are more prone to cracking and root invasion, leading to frequent blockages and backups. If you’re constantly dealing with sewer issues, replacing the entire line with more durable materials like cast iron or PVC could be a cost-effective solution in the long run.
Before deciding on a replacement, have a professional inspection. This will help identify the exact cause and location of the problem, ensuring that the right solution is applied.

Water Line Break
A water line break can cause significant damage if not addressed promptly. Signs of a break include sudden drops in water pressure, unexpected water bills, or visible water pooling on your property. These breaks can occur due to corrosion, ground movement, or freezing temperatures.
In the event of a water line break, it’s crucial to act quickly. Shut off the main water supply to prevent further flooding and contact a professional repair service immediately. They will assess the situation and recommend either a repair or a complete line replacement.

Understanding these aspects of water and sewer line repairs will help you tackle issues effectively. Whether it’s a simple repair or a full replacement, knowing what to expect can save you time, money, and stress.
Next, we’ll explore how to find reliable repair services quickly, ensuring your water and sewer lines are back in working order as soon as possible.
Steps to Quickly Locate Repair Services
When faced with a water or sewer line issue, finding a reliable repair service quickly is essential. Here’s how you can do it:
Local Contractors
Start by reaching out to local contractors. These professionals are familiar with the specific regulations and conditions in your area, making them a reliable choice for water and sewer line repairs. You can find local contractors by asking neighbors for recommendations or checking community bulletin boards.
Tip: Look for contractors with certifications and years of experience in plumbing and sewer repairs. This ensures they have the knowledge and skills needed to handle your problem efficiently.
Emergency Services
In the case of an urgent issue, such as a major leak or sewer backup, you might need emergency services. Many plumbing companies offer 24/7 emergency services to address critical problems immediately.
Remember: Quick response times are crucial in emergencies to minimize damage. It’s wise to have the contact information of a trusted emergency plumber saved in your phone for such situations.
Online Directories
Online directories are a quick and efficient way to find repair services. Websites like Yelp or Angie’s List provide lists of local plumbing professionals, along with reviews and ratings from past customers.
Pro Tip: Use filters to narrow down your search to contractors who specialize in the type of repair you need, whether it’s a simple fix or a complete line replacement. Pay attention to customer feedback regarding the contractor’s punctuality, quality of work, and communication skills.
By using these methods, you can swiftly find the right professionals to handle your water and sewer line repairs. This approach not only saves time but also helps ensure the job is done correctly, preventing future issues.
Now, let’s dive into evaluating repair costs and options to ensure you’re getting the best deal possible.
Evaluating Repair Costs and Options
When dealing with water and sewer line repairs, understanding the costs and options can help you make informed decisions. Here’s what you need to know:
Repair vs. Replacement Costs
The first step is to get a written estimate for both repair and replacement options. Repair costs can vary significantly based on the type of pipe and the extent of the damage. In some cases, a simple repair might be sufficient, but if your pipes are old or made from materials like lead or galvanized steel, a complete replacement might be necessary.
Tip: Always compare multiple quotes from different contractors. This helps you see the cost differences and choose the best option for your budget and situation.
Insurance Coverage
Homeowners insurance might cover certain types of water and sewer line issues, but it depends on your policy. Typically, sudden and accidental events like a burst pipe might be covered. However, routine maintenance issues or negligence usually aren’t.
Pro Tip: Check your insurance policy to see if you have coverage for water or sewer line breaks. Consider additional coverage options for sewer backups, as these can be costly.
Making the Best Decision
When evaluating your options, consider the long-term benefits of replacement versus repair. While a repair might be cheaper initially, a full replacement could prevent future issues and save money over time.
Remember: Quality matters. Opt for contractors who offer warranties on their work. This ensures that if something goes wrong after the repair, you’re covered without extra costs.
By carefully evaluating these factors, you can choose the best approach for your water and sewer line repairs. This not only helps manage costs but also ensures your plumbing system remains in good condition for years to come.
Now that you have an understanding of costs and options, let’s address some common questions about water and sewer line repairs.
Frequently Asked Questions about Water and Sewer Line Repairs
Does insurance cover water line breaks?
Homeowners often wonder if their insurance will cover the costs of water line repairs. In most cases, homeowners insurance policies cover sudden and accidental damage, such as a burst pipe. However, they typically do not cover damage from gradual wear and tear, poor maintenance, or neglect.
It’s important to review your policy details or speak with your insurance provider to understand what specific incidents are covered. Some insurers offer additional riders for water and sewer line coverage, which can be beneficial for older homes or those with outdated plumbing systems.
What is the life expectancy of a sewer line?
The lifespan of a sewer line largely depends on the materials used and the environmental conditions surrounding it. Common materials include:
- Clay pipes, which can last 50-60 years.
- Cast iron pipes, with a lifespan of 75-100 years.
- PVC pipes, which can last over 100 years under optimal conditions.
Factors such as soil conditions, tree root intrusion, and maintenance practices can also affect the longevity of your sewer line. Regular inspections can help identify potential issues early, extending the life of your sewer line.
Are local governments responsible for sewer line repairs?
In most cases, property owners are responsible for the maintenance and repair of water and sewer lines that run from their property to the municipal main. Local ordinances typically define these responsibilities, and it’s crucial for homeowners to be aware of them.
While the city or local government usually handles repairs to the main lines in the street, any issues on your property are typically your responsibility. Make sure to check local regulations to understand your obligations and avoid unexpected repair costs.
By understanding these aspects of water and sewer line repairs, homeowners can better prepare for potential issues and make informed decisions regarding insurance coverage and maintenance responsibilities.
Conclusion
When it comes to Water and Sewer Line Repairs, choosing the right service provider is crucial. At Marchi Paving Inc., we pride ourselves on delivering expert services with over 20 years of experience. Our team is well-equipped to handle any repair or replacement project with precision and efficiency.
What sets us apart is our use of advanced equipment. By investing in state-of-the-art technology, we ensure that each project is completed to the highest standards, minimizing disruption and maximizing results. Whether it’s a small repair or a large-scale replacement, our commitment to quality remains unwavering.
Our approach is simple: provide high-quality, in-house project execution that meets the unique needs of each client. From understanding the specific challenges of your water and sewer lines to offering custom solutions, we strive to exceed expectations every time.
With locations across Massachusetts, including Chelmsford, Acton, and Cambridge, we are well-positioned to serve our community with reliable and prompt service. Trust Marchi Paving Inc. for all your water and sewer line needs, and experience the difference that expert service and advanced equipment can make.
For any questions or to schedule a consultation, reach out to us. We’re here to help you keep your water and sewer lines in top condition.
What is Hardscaping Services: Top 5 Stunning Benefits
What is Hardscaping Services? Hardscaping services revolve around designing outdoor spaces using non-living elements such as stone, wood, and concrete. These elements create both functional and beautiful areas like patios, walkways, and retaining walls, changing your outdoor space into an extended living area.
Dreaming of an outdoor space that’s both functional and stylish? Understanding the difference between hardscaping and landscaping is key. While landscaping involves plants and greenery, hardscaping focuses on the non-living elements that form the structural backbone of your outdoor environment. Think of it as crafting an outdoor room with patios, walkways, and stone walls, creating a space where you can relax, entertain, and enjoy the outdoors without the constant need for maintenance.
This difference is not just about aesthetics—these hardscape structures can change how you use and enjoy your outdoor space. They define areas, create pathways, and even add layers to your garden’s appeal. Combined properly, they improve both your property’s value and functionality, offering an inviting place to host family, friends, or indulge in some private downtime.

What is hardscaping services terms to remember:
– commercial hardscaping service
– hardscape construction service
– hardscape maintenance service
What is Hardscaping Services?
Hardscaping services are all about changing your outdoor spaces with non-living materials. Imagine adding elements like patios, walkways, retaining walls, fire pits, and landscape lighting to create a functional and beautiful outdoor environment.
Non-Living Materials
Hardscaping uses materials such as stone, concrete, and wood. These elements are durable and require far less upkeep than plants. This means you can enjoy your outdoor space without the hassle of constant maintenance.
Patios and Walkways
Patios are the heart of any outdoor living space. They provide a flat, stable surface for furniture, barbecues, and gatherings. Walkways, on the other hand, guide you through your garden, connecting different areas and adding a touch of elegance. Both can be made from a variety of materials, from classic brick to modern concrete pavers.

Retaining Walls
Retaining walls are more than just functional; they add depth and dimension to your landscape. These walls hold back soil, allowing you to create tiered gardens or manage sloped areas. They’re often crafted from stone or concrete for strength and longevity.
Fire Pits
Fire pits are a popular addition to any backyard. They create a cozy atmosphere for gatherings and extend the usability of your outdoor space into the cooler months. Whether wood-burning or gas-powered, a well-placed fire pit becomes a focal point for relaxation and entertainment.
Landscape Lighting
Lighting is the finishing touch that brings your hardscape to life after dark. It highlights pathways, showcases garden features, and creates a safe, inviting ambiance. Energy-efficient LED options provide beautiful illumination while keeping energy costs low.
With hardscaping services, you can craft an outdoor space that suits your lifestyle, enhancing both the beauty and functionality of your home.
Benefits of Hardscaping
Hardscaping offers numerous advantages that can significantly improve your outdoor space. Let’s explore the key benefits:
Low Maintenance
One of the standout benefits of hardscaping is its low maintenance nature. Unlike softscaping, which requires regular watering, trimming, and care, hardscape elements like patios, walkways, and retaining walls need minimal upkeep. This means more time enjoying your space and less time maintaining it. Durable materials like stone and concrete ensure that your hardscape features remain in excellent condition for years.
Property Value
Investing in hardscaping can boost your home’s property value. Potential buyers often appreciate well-designed outdoor spaces that offer both beauty and functionality. According to industry insights, homes with appealing outdoor living areas tend to sell faster and at higher prices. Enhancing your yard with quality hardscaping can be a smart financial move.
Outdoor Living Space
Hardscaping transforms your yard into an outdoor living space. Patios and decks extend your living area, providing a perfect spot for dining, relaxing, or entertaining. Features like fire pits and outdoor kitchens create spaces that encourage gatherings and make your home a hub for social activity.
Durability
Hardscape elements are built to last. Materials like stone, brick, and concrete are designed to withstand the elements and resist wear and tear. This durability means that your investment in hardscaping will continue to pay off over time, withstanding weather changes and heavy use without losing their appeal.
Aesthetics
Finally, hardscaping improves the aesthetics of your property. It adds structure and definition, creating a polished look that’s both functional and visually appealing. Whether it’s a sleek modern patio or a rustic stone pathway, hardscaping lifts the overall design of your outdoor space, making it inviting and stylish.
By integrating hardscaping into your landscape, you create a beautiful, durable, and functional environment that improves your home’s value and your enjoyment of outdoor living.
Key Elements of Hardscaping
When it comes to changing your outdoor space, understanding the key elements of hardscaping is essential. These elements not only improve the beauty of your property but also add functionality and value. Let’s explore some of the most popular hardscaping features.
Patios and Decks
Patios and decks are the heart of any outdoor living area. They provide a solid foundation for entertaining, dining, or simply relaxing. Patios can be made from various materials like concrete, stone, or pavers, allowing for endless design possibilities. Decks, typically constructed from wood or composite materials, offer an liftd space that can seamlessly connect your indoor and outdoor environments.
Walkways and Driveways
Walkways and driveways are more than just pathways; they are crucial for accessibility and aesthetics. A well-designed walkway guides visitors through your garden, while a sturdy driveway improves curb appeal. Materials like brick, gravel, and concrete are popular choices due to their durability and versatility.
Retaining Walls
Retaining walls serve both functional and aesthetic purposes. They help manage soil erosion and provide support on sloped landscapes. Additionally, they can create terraces for planting or seating areas. Retaining walls come in various materials, including natural stone, concrete blocks, and bricks, each offering a unique look.
Outdoor Kitchens
An outdoor kitchen lifts your backyard into a culinary haven. Equipped with grills, countertops, and storage, outdoor kitchens make cooking and entertaining a breeze. They are perfect for those who love hosting barbecues or enjoying meals al fresco. Durable materials like stainless steel and stone ensure these spaces withstand the elements.
Fire Pits
Fire pits are a favorite feature for creating cozy gathering spots. Whether built-in or portable, they add warmth and ambiance to your outdoor space, making it usable even during cooler months. Fire pits can be crafted from stone, metal, or brick, and can be designed to fit any style, from rustic to modern.
Incorporating these key elements into your hardscaping plan can transform your outdoor area into a functional and stylish retreat. Each feature plays a role in enhancing both the utility and the charm of your space, making it a place where memories are made.
Integrating Hardscaping with Landscaping
Creating a harmonious outdoor space isn’t just about adding beautiful features; it’s about integrating hardscaping with landscaping. This balance between the non-living and living elements can transform your yard into a cohesive and functional oasis.
Softscaping and Balance
Softscaping refers to the living components of your landscape, like plants, trees, and flowers. When combined with hardscaping, such as patios and walkways, it creates a balanced environment. The key is to ensure that the hard elements don’t overshadow the natural beauty of the softscape.
For example, a stone pathway winding through a lush garden can direct visitors while allowing the greenery to shine. Balance is achieved when both elements complement each other, enhancing the overall appeal of your outdoor space.
Design Harmony
Achieving design harmony involves careful planning. It’s about ensuring that every hardscape feature, from retaining walls to fire pits, fits seamlessly with the natural landscape. This might mean choosing materials and colors that match your home’s architecture or the surrounding environment.
Consider using curved lines in your hardscaping to mimic natural forms, which can soften the look of rigid structures. This approach not only improves visual appeal but also creates a more inviting atmosphere.
Natural Elements and Functional Spaces
Incorporating natural elements into your hardscape design can make your space feel more organic and less manufactured. Using materials like stone and wood can add an earthy touch that blends with the landscape.
Functional spaces are essential for maximizing the use of your outdoor area. Think about how you want to use the space—whether for entertaining, relaxing, or gardening—and design accordingly. A pergola can provide shade for a seating area, while a series of terraces can create distinct zones for different activities.
By thoughtfully integrating hardscaping with landscaping, you can create an outdoor space that is both beautiful and practical. This synergy not only improves the aesthetic value of your property but also makes it a more enjoyable place to spend time with family and friends.
Frequently Asked Questions about Hardscaping Services
What is included in hardscaping services?
Hardscaping services encompass a wide range of non-living elements designed to improve your outdoor space. These include:
- Patios: Ideal for creating outdoor living spaces, patios are often made from concrete, stone, or pavers. They provide a sturdy area for seating, dining, or just relaxing.
- Walkways: These paths guide foot traffic and connect different areas of your landscape. Materials like brick, stone, or gravel can be used to create aesthetically pleasing and functional routes.
- Retaining Walls: These structures serve both functional and aesthetic purposes. They hold back soil, prevent erosion, and can add dimension to flat landscapes.
- Pergolas: Offering shade and structure, pergolas improve the visual appeal of gardens and patios. They can be adorned with climbing plants or lights for added charm.
- Water Features: Fountains, ponds, and waterfalls can introduce a soothing element to your landscape, providing both visual and auditory appeal.
How does hardscaping differ from landscaping?
The key difference lies in the materials used. Hardscaping involves structural features made from non-living materials like stone, wood, or concrete. These elements are permanent and create the foundation of your outdoor design.
In contrast, landscaping, often referred to as softscaping, includes living components like plants, trees, and shrubs. While hardscaping focuses on form and structure, softscaping brings life and color to your space.
Combining both elements effectively can create a balanced and harmonious outdoor environment. For instance, a patio (hardscaping) surrounded by lush greenery (softscaping) can offer a perfect blend of durability and natural beauty.
What are the maintenance requirements for hardscaping?
Maintenance for hardscaping is generally lower than for softscaping, but it still requires attention to keep it looking its best:
- Sealing: Many hardscaping materials, like stone or concrete, benefit from sealing. This process protects surfaces from stains and weather damage, extending their lifespan.
- Weed Control: Weeds can grow between pavers or stonework. Regularly checking and removing them can prevent damage and maintain a clean appearance.
- Durability: Hardscape elements are known for their durability. However, over time, they may require repairs, such as fixing cracks or replacing broken pieces to maintain their structural integrity.
By staying on top of these maintenance tasks, you can ensure that your hardscaping remains a beautiful and functional part of your outdoor space for years to come.
Conclusion
In Chelmsford, MA, and surrounding areas, Marchi Paving Inc. stands out as a leader in changing outdoor spaces through high-quality hardscaping services. With over 20 years of experience, we pride ourselves on delivering excellence in every project. Our commitment to using advanced equipment ensures that we provide efficient and precise results, whether we’re installing patios, walkways, or retaining walls.
Our team of skilled professionals handles each project with meticulous attention to detail, guaranteeing that your hardscaping elements are not only durable but also aesthetically pleasing. We understand the value of creating outdoor spaces that are both functional and beautiful, enhancing your property’s value and appeal.
Choosing Marchi Paving Inc. means choosing a partner dedicated to changing your outdoor space with style and precision. Whether you’re looking to create a serene garden pathway or a robust outdoor kitchen, our expertise in hardscaping will bring your vision to life.
Ready to revamp your outdoor space? Explore our hardscaping services and find how we can help you create an outdoor environment that you’ll love for years to come.
Boulder Retaining Wall: Top 10 Stunning Designs 2024
Boulder retaining wall installations are a classic yet powerful way to improve outdoor spaces. Known for their rugged beauty and durability, these structures can transform a landscape, offering both practical and aesthetic benefits. Here’s a quick overview to guide you on why boulder retaining walls might be the perfect choice for your property:
- Natural Beauty: They seamlessly blend with the environment, creating a harmonious look that complements natural landscapes.
- Longevity: Well-constructed boulder retaining walls can last over a century, providing a long-term solution that outlives many other structures.
- Durability: These walls withstand harsh weather and erosion, maintaining their structure and appearance for generations.
- Versatility: From gardens to large commercial spaces, they can adapt to various applications, offering unique aesthetics for diverse needs.
In Middlesex County, MA, where maintaining property safety and accessibility is crucial, these walls provide essential support to prevent soil erosion and manage landscapes effectively. Whether for residential or commercial properties, they improve curb appeal while serving essential functional roles.
Building boulder retaining walls effectively requires understanding their construction methods and choosing the right materials, a mix that balances both strength and visual appeal. Stay with us as we dig deeper into what makes these walls not just a choice, but an investment in your property’s value and beauty.
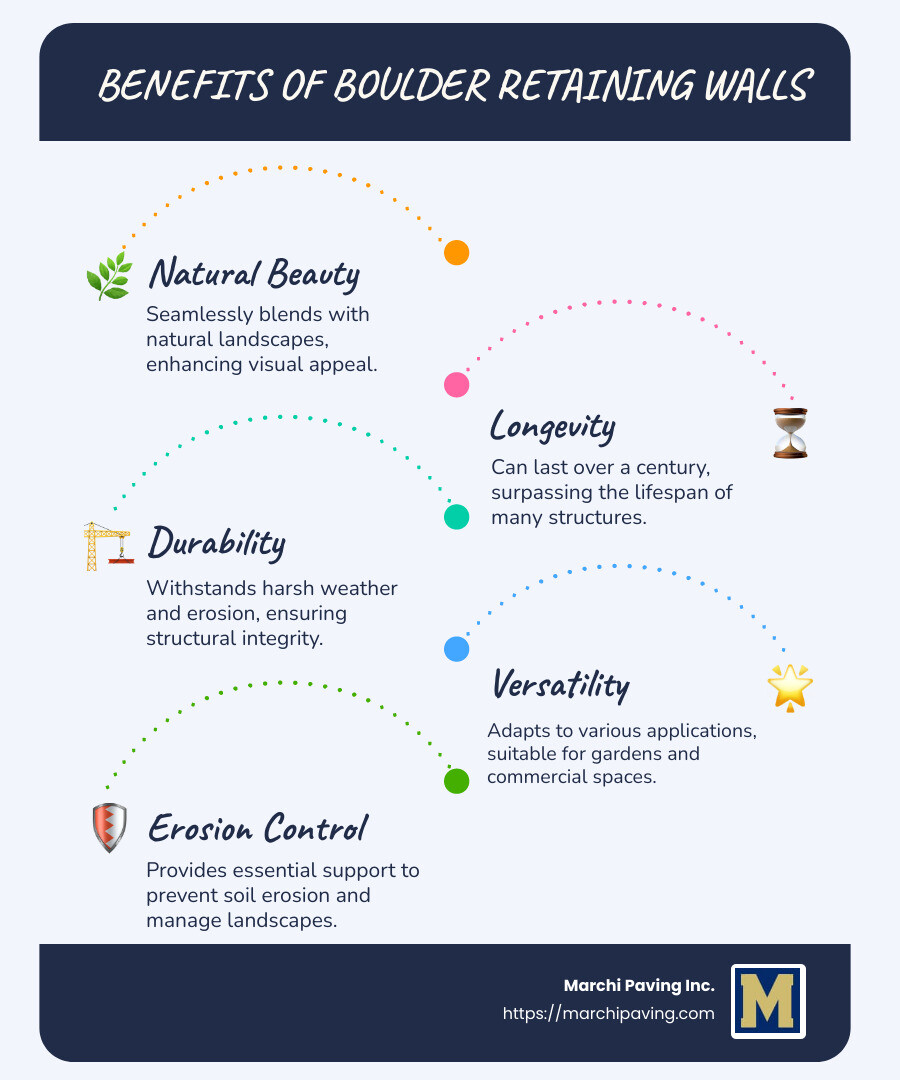
Boulder retaining wall terms made easy:
– retaining wall ideas
– how to build retaining walls
– landscape blocks
What is a Boulder Retaining Wall?
A boulder retaining wall is a type of structure built primarily with large rocks known as boulders. These walls serve both practical and aesthetic purposes, offering support to landscapes and enhancing visual appeal.
Definition and Purpose
Boulder retaining walls are designed to hold back soil and prevent erosion. They are especially useful in sloped areas where soil movement is a concern. Unlike concrete or brick retaining walls, boulder walls provide a natural look that can blend seamlessly with outdoor environments.
What Are Boulders?
Boulders are large rock fragments that are typically greater than 10 inches (25.6 cm) in diameter. They are known for their strength and resistance to weathering, making them ideal for building long-lasting structures. Their size and weight help stabilize the wall, reducing the need for additional reinforcements.
Types of Rocks Used
Different types of rocks can be used to construct boulder retaining walls, each offering unique characteristics:
- Granite: Known for its strength and durability, granite is a popular choice for retaining walls. It comes in various colors and textures, adding a distinctive look to your landscape.
- Sandstone: This rock type is softer than granite but offers a warm, earthy appearance. Sandstone can be easily cut and shaped, making it versatile for different designs.
- Quartz: Quartz boulders are highly resistant to weathering and provide a sleek, modern look. Their sparkling appearance can add a touch of elegance to your wall.
- Limestone: Limestone is often chosen for its uniform color and texture, which gives a cohesive look to the wall. It is also relatively easy to work with.
- Basalt: This dense, dark rock is incredibly strong and can withstand significant pressure. Basalt is ideal for walls that require extra stability.
- Bluestone: Known for its blue-gray hues, bluestone offers a unique aesthetic. It is durable and can be used in both formal and informal designs.
Each rock type brings its own set of benefits, allowing you to customize your boulder retaining wall to match your landscape’s needs and your personal style.
Incorporating boulders into your landscape not only provides essential support but also lifts the overall design, making it a standout feature in your outdoor space. Whether you’re aiming for a rustic feel or a polished look, the right choice of boulders can make all the difference.
Pros and Cons of Boulder Retaining Walls
When considering a boulder retaining wall, it’s important to weigh the pros and cons to determine if it’s the right choice for your landscape.
Pros
Visual Appeal
Boulder walls offer a natural beauty that is hard to replicate with other materials. Their organic look can improve any outdoor space, blending seamlessly with gardens and natural surroundings.

Durability
Boulders are incredibly durable and resistant to erosion. A well-constructed boulder wall can last over 100 years, standing the test of time and weather.

Versatility
No two boulders are alike, allowing for unique designs that add character to your landscape. You can create distinctive patterns and shapes that suit your style.
Low Maintenance
Once built, these walls require minimal upkeep. Their robust nature means they won’t need frequent repairs, saving you time and effort in the long run.
Cost
Depending on your location, boulders can be a cost-effective option. In areas where they are abundant, sourcing these natural materials can be cheaper than alternatives like concrete.
Cons
Space Requirements
Boulders are large and require ample space for installation. In smaller yards, they might not be practical due to their size and the need for heavy machinery during construction.
Height Limitations
Boulder retaining walls are not ideal for very tall structures. If you need a high wall, concrete might be a better option due to its structural capabilities.
Construction Complexity
Building with boulders can be challenging. The size and weight of the rocks often necessitate specialized equipment and expertise, which can increase construction costs and complexity.
Cost in Some Areas
In regions where boulders are not readily available, the cost of transporting these heavy materials can be high. Additionally, the need for professional installation can add to the overall expense.
Considerations
Before deciding on a boulder retaining wall, assess your landscape’s specific needs and constraints. Consider factors like the available space, desired wall height, and budget. While boulders offer unique benefits, they may not be the best fit for every project.
Construction Methods for Boulder Retaining Walls
When building a boulder retaining wall, choosing the right construction method is crucial. There are three main approaches: the Dry Stack (Gravity) Method, the Wet-Laid (Mortar) Method, and a Combination Method. Each has its unique features and benefits. Let’s explore them.
Dry Stack (Gravity) Method
The dry stack method is all about using gravity to hold the boulders in place. This technique relies on the natural weight of the rocks, which are stacked in an interlocking pattern. The key here is to carefully select and arrange the rocks so they fit together seamlessly. This interlocking is achieved through the specific contours and weight of the rocks, along with frictional interaction.
One significant advantage of the dry stack method is drainage. The gaps between the rocks allow water to seep through, relieving pressure that can build up behind the wall. This natural drainage system is especially beneficial in areas with heavy rainfall or wet soil, as it helps maintain the wall’s integrity and longevity.
However, this method requires time, patience, and expertise. Finding the right rocks and fitting them together can be more challenging than using mortar.
Wet-Laid (Mortar) Method
The wet-laid method uses mortar or cement to provide extra strength to the wall. This approach is ideal for dry environments where moisture buildup is less of a concern. Mortar acts as a binding agent, holding the boulders together and adding to the wall’s overall stability.
If you live in a moist area, you can still use this method, but you’ll need to incorporate proper drainage. This might involve adding drainage stone behind the wall or installing drainage pipes to prevent water pressure from building up.
Choosing the right type of mortar is crucial. Types “M” and “S” are recommended. Type “M” is the strongest and works well for stone, while Type “S” is suitable for smaller boulder walls and handles moisture better.
Combination Method
For those seeking a balance between the natural look of a dry stack wall and the strength of a mortar wall, the combination method is an excellent choice. This approach involves using mortar along the rear of the wall, creating the illusion of a dry-stacked wall from the front. You can even use pigmented mortar to match the stones, minimizing the visibility of mortar lines.
This method offers the best of both worlds—natural aesthetics combined with improved structural strength. It can be a great option if you want a robust wall that still retains the rustic charm of a dry stack construction.
By understanding these construction methods, you can choose the best approach for your boulder retaining wall project. Each method has its strengths and is suited to different environments and aesthetic preferences.
Types of Rocks for Boulder Retaining Walls
When it comes to building a boulder retaining wall, selecting the right type of rock is essential. Different rocks offer unique characteristics that can affect the wall’s appearance, durability, and ease of construction. Let’s explore some of the popular rock types used in boulder retaining walls.
Fieldstone Boulders
Fieldstone boulders are naturally occurring stones found on the earth’s surface. They are often rich in character, featuring natural elements like moss and dirt. This gives them an aged, rustic appearance that blends beautifully into natural landscapes. Fieldstone boulders are irregular in shape and size, adding a unique charm to any retaining wall. However, their uneven surfaces can make them challenging to stack, requiring skill and patience to achieve a stable structure.
Quarry Boulders
Quarry boulders are extracted from the ground and tend to have a more uniform shape compared to fieldstone. This makes them easier to work with, especially for those new to building retaining walls. Quarry boulders provide excellent stability and are ideal for creating neat, structured walls. Because they are less weathered than fieldstone, they offer a cleaner look, which can be desirable for more formal landscaping designs.
River Rock
River rock is known for its smooth, rounded edges, a result of being naturally shaped by flowing water over time. These stones are often used for their aesthetic appeal, bringing a sense of tranquility and flow to any landscape. The rounded, smooth edges of river rock make it less suitable for stacking in a retaining wall without mortar, but they are perfect for decorative elements or as part of a mixed-material design.
Other Rock Types
- Granite: Known for its hardness and durability, granite is a long-lasting choice for retaining walls. Its natural sparkle and range of colors can add visual interest.
- Sandstone: This rock is relatively easy to work with due to its softer nature. Its earthy tones make it a popular choice for natural-looking walls.
- Quartz: With its crystal-like appearance, quartz can add a touch of elegance. However, it’s less common due to its higher cost.
- Limestone: A versatile and strong option, limestone offers a classic look. Its light color can brighten up shady areas.
- Basalt: Known for its dark color and fine grain, basalt adds a sleek, modern look to retaining walls.
- Bluestone: This rock is valued for its rich blue-gray color and is often used in upscale landscaping projects.
Choosing the right rock for your boulder retaining wall depends on your aesthetic preferences, budget, and the specific requirements of your site. Each rock type brings its own beauty and functional benefits to your landscape project.
Cost of Boulder Retaining Walls
Building a boulder retaining wall can be a significant investment, but understanding the factors that influence cost can help you plan better.
Material Cost
The type of boulders you choose will greatly impact the cost. Fieldstone boulders can add unique character but may be more expensive due to their rustic appeal and irregular shapes. Quarry boulders are generally more affordable and easier to stack, making them a cost-effective choice for beginners. If you’re aiming for a polished look, river rock can be pricier due to its aesthetic smoothness and the additional work needed to secure them in place.
Labor Cost
Labor costs for building a boulder retaining wall can range from $40 to $80 per hour or $10 to $30 per square foot. The complexity of the wall design and the type of boulders used will affect these costs. For example, a wall with a random pattern using various sizes of boulders may require more skill and time, increasing labor expenses.
Additional Factors
Several other elements can influence the final cost of your retaining wall:
- Size and Design: Larger walls require more materials and labor. Complex designs with curves or tiers will also increase costs.
- Foundation and Drainage: Proper foundation and drainage are crucial, especially for taller walls. This might involve deeper excavations and installation of drainage systems, which can add to the expense.
- Engineered Plans: For walls over 4 feet high, hiring a structural engineer to create detailed plans is often necessary, adding to the upfront costs.
- Heavy Construction: If your site requires clearing, leveling, or the removal of existing structures, heavy machinery and skilled operators will be needed, further increasing costs.
- Geogrid: Using geogrid can stabilize the soil behind the wall, especially in sandy areas. While beneficial, it can increase labor costs by up to 50%.
By considering these factors, you can better estimate the cost of your boulder retaining wall and make informed decisions that fit your budget and design goals.
Design Ideas for Boulder Retaining Walls
Creating a boulder retaining wall isn’t just about function—it’s also about style. Here are some design ideas to make your wall stand out:
Variegated Boulder Wall
Imagine a wall with boulders in hues of red, pink, off-white, and soft bluish-green. This kind of wall blends beautifully with natural surroundings. The varied colors add visual interest, and you can soften the look by planting flowers and greenery among the stones. This approach turns a structural necessity into a landscape feature.
Dry Stacked Flat Boulder Wall
For a more rustic look, consider a dry stacked flat boulder wall. This method involves stacking stones without mortar. It’s like a puzzle, where each piece fits snugly into the next. Using stones with deep orange hues common in fieldstone can add warmth to your landscape. Plus, the dry-stack method is excellent for drainage since water can seep through the gaps.
Mortared Stone Wall
If you need extra strength, a mortared stone wall might be the way to go. This method uses mortar to hold smaller, round boulders in place. You can mix stones of different shapes and sizes, creating a unique texture. Mortared walls are sturdy and can handle more pressure, which is ideal for retaining large amounts of soil.
Boulder Seating Wall
Why not add extra seating with your retaining wall? A boulder seating wall around a firepit can be both functional and attractive. Use boulders that are uniform in size and flat on top for comfortable seating. This design not only retains soil but also provides a cozy gathering spot for family and friends.
Mixed Material Wall
Boulders don’t have to stand alone. You can create a mixed material wall by combining boulders with other materials like weathered steel or wood. This blend can give your wall a modern twist while maintaining a natural feel. The contrast between the rugged boulders and sleek steel creates a striking visual effect.
Each of these design ideas offers a unique way to incorporate a boulder retaining wall into your landscape, balancing both function and aesthetics.
Frequently Asked Questions about Boulder Retaining Walls
Do boulders make good retaining walls?
Absolutely! Boulders make excellent retaining walls due to their natural resilience and durability. They are solid and resistant to erosion, which means they can withstand harsh weather conditions and immense pressure from the soil they retain. Boulders also offer a stunning natural look that improves any landscape, blending seamlessly with their surroundings. Their versatility allows for unique and distinctive designs, making them a popular choice for homeowners who want a wall that stands out.
Are boulder retaining walls expensive?
The cost of a boulder retaining wall can vary significantly based on several factors. On average, prices range from $2,000 to $10,000, with the cost of boulders alone priced between $50-$200 per linear foot, or $100-$350 per ton. Factors influencing the cost include the availability of boulders in your area, the wall’s size and complexity, and the need for professional expertise and equipment. If you live in an area where boulders are plentiful, you might find it more cost-effective than other materials. However, if professional help is required due to the boulders’ size and weight, this can increase the overall cost.
How long do boulder retaining walls last?
A well-built boulder retaining wall is incredibly long-lasting. These walls can endure for upwards of 100 years or more, often outlasting the structures they were built to support. The longevity of a boulder wall is largely attributed to the inherent durability of the boulders themselves, which are impervious to weather-induced erosion. Proper construction, including adequate drainage and foundational support, will further ensure the wall’s stability and longevity.
Conclusion
In summary, boulder retaining walls are a fantastic choice for those looking to combine durability with natural beauty in their landscape. These walls not only stand the test of time but also add a touch of elegance and uniqueness to any outdoor space. With their ability to withstand harsh weather and immense pressure, boulders provide a resilient solution for retaining soil and preventing erosion.
At Marchi Paving Inc., we specialize in creating stunning and functional boulder retaining walls that improve the beauty of your property. Our team has over 20 years of experience in hardscaping services, ensuring that each project is executed with precision and care. We use advanced equipment and high-quality materials to deliver results that last a lifetime.
Whether you’re looking to replace an old timber wall or build a new retaining wall from scratch, our experts are here to help. We understand the importance of proper construction techniques and drainage solutions to ensure the longevity of your wall.
Ready to transform your landscape with a beautiful and durable boulder retaining wall? Contact us today to learn more about our hardscaping services and how we can help bring your vision to life. Let us help you master the art of boulder retaining walls with our expertise and commitment to excellence.
Asphalt Driveways: Top 6 Costly Mistakes in 2024
Asphalt driveways are a popular choice for homeowners and property managers due to their affordability and durability. Whether you’re considering installing a new driveway or maintaining an existing one, understanding the key elements—cost factors, installation process, and maintenance tips—will help you make informed decisions.
Here’s a quick overview:
- Cost Factors: Asphalt driveways typically run between $7 and $13 per square foot, with costs influenced by size, depth, and type of asphalt used. Recycled options can provide eco-friendly and cost-effective alternatives.
- Installation Process: This involves crucial steps like site preparation, laying a stable foundation, and correctly compacting asphalt layers. Following these steps ensures a driveway that’s both long-lasting and smooth.
- Maintenance Tips: Regular maintenance keeps an asphalt driveway in top shape. Sealing every 3-5 years, cleaning, and promptly fixing cracks can extend the life of your driveway.
Asphalt provides a sturdy, attractive surface with proper care and installation. Ready to explore more? Let’s dive into each aspect to understand how it impacts your project and property’s value.

Terms related to asphalt driveways:
– Paving Contractor
– local asphalt paving companies
– pavers company near me
Cost of Asphalt Driveways
When planning for asphalt driveways, understanding the costs involved is crucial. Let’s break down the short-term and long-term costs, as well as the cost per square foot, to give you a clear picture.
Short-Term Costs
Initial Installation: The initial cost of installing an asphalt driveway typically ranges from $7 to $13 per square foot. This price includes both materials and labor. Factors like local labor rates, driveway size, and the quality of materials can influence this cost.
Site Preparation: Before laying the asphalt, the site needs proper preparation. This includes grading, ensuring proper drainage, and possibly removing any existing pavement. These preparation steps can add to the short-term costs but are essential for a durable driveway.
Long-Term Costs
Maintenance: While asphalt is durable, it requires regular maintenance to maximize its lifespan. This includes sealcoating every 3-5 years, which helps protect the surface from elements like water and UV rays. Sealcoating costs can range from $0.15 to $0.25 per square foot.
Repairs: Over time, you might need to address issues like cracks or potholes. Regular crack filling and pothole repairs can prevent more extensive damage and are relatively inexpensive compared to full resurfacing.
Cost Per Square Foot
The cost per square foot for an asphalt driveway can vary based on several factors:
- Materials: Different types of asphalt, such as recycled or porous asphalt, might have varying costs. Recycled asphalt is often cheaper and eco-friendly, while porous asphalt offers better drainage but might come at a higher price.
- Thickness: Driveways intended to support heavier vehicles might require thicker asphalt, increasing the material cost per square foot.
- Regional Variations: Prices can differ based on your location due to differences in material availability and labor costs.
By considering these factors, you can better plan your budget for both the initial installation and ongoing maintenance of your asphalt driveway. Next, we’ll explore the different types of asphalt driveways available to suit your specific needs.
Types of Asphalt Driveways
When choosing the right material for your asphalt driveway, it’s important to know the different types available. Each type has its own benefits and ideal uses. Let’s explore three popular options: porous asphalt, recycled asphalt, and hot mix asphalt.
Porous Asphalt
Porous asphalt is designed with tiny holes that allow water to pass through, reducing runoff and helping manage stormwater. This makes it an eco-friendly choice. It helps recharge groundwater and reduces pollutants, which is why it’s recognized as an EPA best practice.
However, porous asphalt requires a deeper stone bed for water storage and might need more frequent maintenance to prevent clogging. It’s a great option for areas where water drainage is a concern, like parking lots and driveways.
Recycled Asphalt
Recycled asphalt is made from old asphalt materials that have been repurposed. It’s one of the most recycled materials in the U.S., making it an environmentally friendly choice. Using recycled asphalt is not only better for the environment but also improves the product’s strength and durability. It offers a stronger rut resistance than virgin asphalt mix.
This type of asphalt is often cheaper than new asphalt, making it a cost-effective option for many homeowners. Plus, it reduces the need for new raw materials, lowering the overall carbon footprint of your driveway project.
Hot Mix Asphalt
Hot mix asphalt (HMA) is the most common type used for asphalt driveways. It’s made by heating and combining materials at high temperatures, typically between 300 and 350 degrees Fahrenheit. This process results in a durable and strong surface, ideal for high-traffic areas like highways and busy driveways.
HMA is available in different mixes, such as dense-graded and stone matrix asphalt, each suited for specific applications. Its durability makes it a preferred choice for those looking for a long-lasting driveway solution.
Understanding these types of asphalt can help you choose the best option for your driveway needs. Whether you prioritize environmental benefits, cost savings, or durability, there’s a type of asphalt that fits your project.

Next, we’ll dive into the installation process to ensure a smooth and successful asphalt driveway project.
Installation Process
Creating a durable and good-looking asphalt driveway involves several essential steps. Here’s a quick guide to what happens during the installation process.
Site Preparation
The first step in any driveway project is site preparation. This phase is crucial for ensuring a stable and long-lasting driveway.
- Clearing the Area: The site must be cleared of any existing pavement, vegetation, or debris. This ensures a clean surface to work on.
- Excavation: The ground is excavated to the required depth, typically between 8-12 inches. This depth allows for a solid base that can support the asphalt layers.
- Grading and Slope: Proper grading is essential for water drainage. The area is sloped to direct water away from the driveway, preventing future water damage.
- Compacting the Soil: The soil is compacted to create a stable base. This step is crucial for preventing settling or shifting over time.
Laying the Foundation
A strong foundation is vital for a long-lasting asphalt driveway.
- Geotextile Fabric: Some contractors use a geotextile fabric to prevent soil and base material from mixing. This step is optional but can improve the driveway’s durability.
- Base Layer: A layer of crushed stone or gravel, usually about 8 inches thick, is added. This provides a solid foundation for the asphalt.
- Compaction: The base material is compacted thoroughly using heavy machinery. This ensures a firm and even surface for the asphalt layers.
Compacting Asphalt
Once the foundation is set, it’s time to lay and compact the asphalt.
- Binder Course: A 2.5-inch layer of larger aggregate asphalt is applied as the binder course. This layer provides strength and stability to the driveway.
- Compaction: The binder course is compacted with a steel roller to ensure it is firm and even.
- Surface Course: A 1.5-inch layer of finer aggregate asphalt is applied as the surface course. This top layer provides a smooth and watertight finish.
- Final Compaction: The surface course is compacted thoroughly, resulting in a flat and smooth surface. Specialized tools are used to compact the edges for a neat finish.
Each step in the installation process is crucial for ensuring a durable and aesthetically pleasing asphalt driveway. Proper preparation, foundation laying, and compaction can significantly extend the lifespan of your driveway, making it a worthwhile investment.
Next, we’ll explore maintenance and repair tips to keep your driveway in top condition.
Maintenance and Repair
Keeping your asphalt driveway in top condition requires regular maintenance and timely repairs. Here’s how you can extend its lifespan and maintain its appearance.
Sealcoating
Sealcoating is a protective layer applied to the surface of your driveway. It acts like sunscreen for your asphalt, shielding it from the sun, rain, and chemicals.
- Protection Against Elements: Sealcoating prevents water penetration, reducing the risk of cracks and potholes. It also protects against UV rays that can cause the asphalt to dry out and become brittle.
- Improved Appearance: A fresh coat of sealant gives your driveway a sleek, black finish, improving curb appeal.
- Frequency: Experts recommend applying sealcoating every 2-3 years. This regular maintenance can significantly extend the life of your driveway.

Crack Filling
Cracks are inevitable, but addressing them early can prevent bigger problems. Crack filling involves sealing these gaps to stop water from seeping in and causing further damage.
- Why It Matters: Water infiltration can lead to potholes and base failure. Filling cracks promptly helps maintain the driveway’s integrity.
- Cost-Effective: Crack filling is a simple, low-cost solution that can save you from expensive repairs later.
- DIY or Professional: You can fill minor cracks yourself using a hot sealant. For larger cracks, it might be best to call in professionals like Marchi Paving for a thorough job.
Pothole Repair
Potholes not only look bad, but they can also damage vehicles and pose safety risks. Repairing them promptly is essential.
- Repair Process: Pothole repair involves cleaning the hole, filling it with asphalt mix, and compacting it to ensure durability.
- Cost: Depending on the size, pothole repair can cost between $150 to $400. It’s a small price to pay compared to the damage unchecked potholes can cause.
- Prevention: Regular maintenance like sealcoating and crack filling can prevent potholes from forming in the first place.
Proper maintenance and timely repairs are crucial for keeping your asphalt driveway in excellent condition. With regular care, you can prevent damage, extend its lifespan, and maintain its appearance.
Next, we will address some frequently asked questions about asphalt driveways, helping you make informed decisions for your project.
Frequently Asked Questions about Asphalt Driveways
Is an asphalt driveway cheaper than concrete?
Yes, asphalt driveways are generally cheaper than concrete ones. The cost per square foot for asphalt ranges from $3 to $5, while concrete can cost $7 to $13 per square foot. This makes asphalt a more budget-friendly option for homeowners.
Installation costs are also lower for asphalt. Asphalt can be laid quickly, reducing labor time and costs. In contrast, concrete requires more labor-intensive processes, which increases the installation cost.
How long does an asphalt driveway last?
An asphalt driveway can last between 15 to 20 years with proper care. Some installations even reach up to 30 years when well-maintained. Regular maintenance, like sealcoating every 2-3 years and prompt crack repair, is crucial for extending the lifespan.
The impact of maintenance is significant. Without regular upkeep, water can seep into cracks, leading to potholes and base failure, which shortens the driveway’s life.
What are the cons of asphalt driveways?
While asphalt driveways offer many benefits, there are some drawbacks to consider:
- Heat Absorption: Asphalt absorbs heat due to its dark color, which can make it hotter than concrete surfaces. This heat can soften the asphalt in very high temperatures.
- Color Limitations: Asphalt typically comes in one color—black. While this can look sleek, it doesn’t offer the variety of colors and patterns that concrete can provide.
Despite these cons, many homeowners choose asphalt for its cost-effectiveness and ease of installation. Understanding these factors can help you decide if an asphalt driveway is the right choice for your home.
Conclusion
Choosing the right contractor for your asphalt driveway project is crucial. At Marchi Paving Inc., we pride ourselves on delivering high-quality execution with the use of advanced equipment.
High-Quality Execution
With over 20 years of experience, we ensure that every project is handled with precision and care. Our in-house execution strategy means we can maintain strict quality control over every aspect of the job, from site preparation to the final finish. This commitment guarantees that your driveway not only looks great but also stands the test of time.
Advanced Equipment
We invest in state-of-the-art machinery to improve the efficiency and accuracy of our work. Our advanced equipment allows us to complete projects on time and within budget, without compromising on quality. This means you get a smooth, durable surface that improves your home’s curb appeal and functionality.
When you choose Marchi Paving Inc., you’re not just hiring a contractor; you’re partnering with a team dedicated to excellence. Our local expertise in Chelmsford, MA, ensures that we understand the specific needs and challenges of our community, allowing us to provide personalized solutions custom to your specific requirements.
Ready to start your project? Contact us today to experience the Marchi Paving difference. Let us help you achieve a beautiful, durable driveway that complements your home.