
Main Water Line Repair Cost: Top 5 Shocking Facts 2025
Main water line repair cost can be a hot topic for homeowners and property managers alike. Understanding these costs can help you make informed decisions when your property’s water supply is on the line. Here’s a quick look at what’s involved:
- Typical Repair Factors: Material choice and labor add to your total costs.
- Avoid Low Quality: Cheap fixes might mean more costly repairs later.
- Finding Experts: Licensed plumbers offer peace of mind with their expertise.
Dealing with water line issues is not just about money; it’s about ensuring the smooth flow and safety of your property’s most essential resource. A damaged main water line can bring substantial challenges, from structural damage to potential health hazards due to contaminated water. These issues underscore the importance of understanding the fundamentals of main water line repair.
While DIY repairs might seem cost-effective, they often lead to mishaps that can escalate the problem. The best course remains engaging professionals, like licensed plumbers, who are well-versed in minimizing further damage and ensuring quality repairs. Given their expertise, understanding how to handle permits, and the intricacies of plumbing, professionals can help ensure the longevity and safety of your home’s water lines.

Find more about main water line repair cost:
– cost to replace water service line
– fix water line leak
– underground water line
Understanding Main Water Line Repair Costs
When it comes to main water line repair cost, several factors come into play. It’s not just about fixing a leak; it’s about understanding the various elements that contribute to the total expense. Let’s explore the details.
Factors Influencing Costs
- Location and Accessibility: Where your water line is located can significantly affect the repair costs. If the line is under a concrete driveway or deep beneath the ground, it will require more labor and equipment to access, increasing the cost.
- Permits: Many cities require permits for water line repairs, which can range from $250 to over $1,000. Always check with your local authorities to understand these requirements.
- Ground Conditions: The type of soil around your water line can also impact costs. For instance, compacted clay, large rocks, or tree roots may require special excavation equipment, driving up the cost.
- Water Line Material: The material of your existing water line can affect both the repair approach and cost. Copper, for example, is durable but more expensive, while materials like PVC or PEX are cheaper but less durable.
Material Costs Breakdown
- Copper Piping: Known for its longevity, copper piping can last 50 to 100+ years. However, with prices ranging from $2.00 to $10.00+ per linear foot, it’s a more costly option.
- CPVC Piping: This material is a more affordable alternative to copper, with costs between $0.50 and $5.00 per linear foot. It offers good durability but may not last as long as copper.
- PEX Pipe: PEX is a flexible and budget-friendly option, costing between $0.50 and $5.00 per linear foot. It is easier to install, which can reduce labor costs, but it typically lasts up to 30 to 50 years.

Understanding these factors and material options can help you make a more informed decision when faced with a main water line repair. It’s crucial to weigh the pros and cons of each material and consider the specific conditions of your property. While the initial costs might be daunting, choosing the right materials and professionals can save you from more expensive repairs down the line.
Identifying issues with your main water line early can save you from costly repairs and potential property damage. Here are some telltale signs that indicate you might need a main water line repair. Please note that the costs mentioned are average estimates based on internet data and not actual costs for Marchi Paving. Prices can vary widely, with the high end being at least 3x the average pricing.
Discolored Water
If you notice brown or rust-colored water coming from your faucets, it could be a sign of a breach in your main water line. Contaminants such as soil or corrosion can enter through cracks, leading to discolored water. This isn’t just an aesthetic issue; it could pose health risks.
Puddles in Your Yard
Unexpected puddles or wet spots in your yard, especially when it hasn’t rained, might point to a leaking main water line. Water pooling on the surface often indicates a significant leak that needs immediate attention. Ignoring this sign can lead to more severe problems like soil erosion or foundation damage.
High Water Bills
A sudden spike in your water bill without a change in usage is a red flag. Even small leaks can lead to substantial water loss over time, driving up costs. Monitoring your water bill closely can help you catch leaks early.

Low Water Pressure
Experiencing a drop in water pressure at your faucets or shower? This could be due to a leak or break in your main water line. Reduced water flow means less water is reaching your home, which is not only inconvenient but also a sign of a potentially serious issue.
If you notice any of these signs, it’s crucial to act quickly. Ignoring them could lead to more extensive damage and higher repair costs. Consulting a professional plumber can help you diagnose and address the problem efficiently.
DIY vs. Professional Repair
Deciding between a DIY approach and hiring a professional for main water line repair is a crucial choice. Let’s explore why hiring a professional is often the best decision.
Why Hire a Professional
Expertise Matters
Professional plumbers bring years of training and experience to the table. This expertise ensures that they can accurately diagnose problems and implement effective solutions. They understand the complexities of plumbing systems and can spot issues that a DIYer might overlook.
Risks of DIY
Attempting to repair a main water line yourself can lead to unintended consequences. Mistakes in material choice, installation, or support can cause further damage. Additionally, working with contaminated water poses health risks. Without the right skills, you might find yourself facing even bigger problems down the road.
Regulations and Local Codes
Main water line repairs often require permits and must comply with local building codes. Professional plumbers are familiar with these regulations and can ensure that all work is up to code. This not only avoids potential legal issues but also guarantees the safety and reliability of the repair.
Proper Equipment
Professionals have access to specialized tools and equipment necessary for effective repairs. From pipe cutters to trenchless technology, having the right tools makes a significant difference in the quality and efficiency of the repair. DIYers often lack access to these resources, which can compromise the outcome.
In summary, hiring a professional plumber for your main water line repair can save you time, money, and stress. Their expertise, adherence to regulations, and access to the right equipment ensure a job well done. This peace of mind is invaluable when dealing with such a critical component of your home’s infrastructure.
Next, we’ll address some frequently asked questions about main water line repair costs. Please note that any pricing mentioned will be average costs based on internet data and not actual costs for Marchi Paving. When considering these averages, it’s important to understand that prices can vary widely, with the high end being at least three times the average pricing.
Frequently Asked Questions about Main Water Line Repair Cost
How do you know if your main water line is broken?
Detecting a broken main water line isn’t always straightforward since it’s buried underground. However, there are several signs to watch for:
- Higher-Than-Average Water Bills: A sudden increase in your water bill could indicate a leak.
- Flooding in Your Yard or Home: Unexplained puddles in your yard or water in your basement can be warning signs.
- Reduced Water Pressure: If your faucets are trickling instead of flowing, it might be due to a leak.
- Discolored Water: Brown or cloudy water can signal contamination from a pipe breach.
Using these signs as a guide can help you act quickly, minimizing main water line repair costs.
Can I replace my main water line by myself?
While it might be tempting to tackle the job yourself to save money, replacing a main water line is not a typical DIY project. Here’s why:
- Regulations and Permits: Many areas require permits for such repairs. DIY repairs might not meet local codes, leading to legal and safety issues.
- Risks: Mistakes can cause more damage. Incorrect installation can lead to leaks and further property damage.
- Expertise and Equipment: Professional plumbers have the tools and know-how to do the job right. DIYers often lack the necessary equipment and experience.
Attempting a DIY repair can end up costing more in the long run. It’s usually best to hire a professional to ensure the job is done safely and correctly.
What is the life expectancy of a main water line?
The lifespan of a main water line depends on the material it’s made from:
- Copper Pipes: Typically last 50-70 years, but can be prone to corrosion over time.
- PEX Pipes: Known for flexibility and resistance to scale, PEX pipes can last up to 50 years.
- CPVC Pipes: These can last between 40-50 years but may become brittle with age.
Regular maintenance and timely repairs can extend the life of your water line. Keeping an eye out for signs of wear and addressing issues promptly helps maintain its integrity and longevity.
Conclusion
Choosing the right professionals for your main water line repair is crucial, and that’s where we come in. At Marchi Paving Inc., based in Chelmsford, MA, we pride ourselves on delivering top-notch services tailored to meet your needs. With over 20 years of experience, our team of skilled professionals is dedicated to providing high-quality workmanship with a focus on safety and customer satisfaction.
Our comprehensive range of services ensures that every aspect of your water line repair is handled with precision and care. From obtaining necessary permits to using state-of-the-art equipment, we take care of it all. Our expertise extends beyond just water line repairs; we offer a variety of services including asphalt paving, excavation, and drainage solutions. This broad scope of services allows us to approach each project with a holistic view, ensuring the best possible outcomes.
We understand that dealing with water line issues can be stressful. That’s why we prioritize clear communication and a seamless process from start to finish. Our commitment to excellence has earned us a reputation as a trusted contractor in the Chelmsford area and beyond.
If you’re facing water line issues or need expert advice, don’t hesitate to reach out. Let us handle your repair needs with the professionalism and expertise you deserve. For more information on our services, visit our excavation services page.
Trust Marchi Paving Inc. to keep your water flowing smoothly. We’re here to help. Please note that any pricing mentioned in our articles reflects average costs based on internet data and not actual costs for Marchi Paving. Always consider a wide range of prices, with the high end being at least 3x the average pricing, to ensure a comprehensive understanding of potential expenses.
Hardscape Designers: Top 5 Tips for Stunning Results
Hardscape designers are essential in changing both small and large outdoor spaces into functional and aesthetically pleasing environments. Hardscaping involves the use of non-living elements like stone, concrete, and wood to improve the design and functionality of your outdoor area. It plays a pivotal role in landscape design by providing structure through patios, pathways, or retaining walls that increase the value and usability of the space.
To address your immediate search intent regarding hardscape designers, here are a few key points:
- Hardscape designers focus on non-living features like pathways and patios.
- They improve both the aesthetics and functionality of outdoor spaces.
- They integrate hardscapes seamlessly with the surrounding landscape.
Hardscaping is more than just placing a few stones around a garden. It’s about creating focal points and functional spaces that complement the natural environment. Whether you’re planning a quaint garden path or a grand patio, hardscape designers help bring your vision to life while ensuring durability and low-maintenance solutions.

Important hardscape designers terms:
– hardscape design
– hardscape construction
– hardscape maintenance service
Understanding Hardscape Design
Hardscape design is an art that combines practicality with beauty. It involves selecting the right materials, ensuring functionality, and enhancing aesthetics to create outdoor spaces that are both useful and visually appealing.
Hardscape Materials
The choice of materials is crucial in hardscape design. Common materials include:
- Stone: Durable and natural, stones like granite and limestone are popular for pathways and retaining walls.
- Concrete: Versatile and cost-effective, it’s often used for patios and driveways.
- Wood: Provides a warm, rustic feel for decks and fences.
- Metal: Often used for accents like railings or furniture, adding a modern touch.
Selecting the right materials depends on the specific needs of your project, local climate, and personal style preferences.
Functionality
Functionality is at the heart of every successful hardscape project. Hardscape designers ensure that each element serves a purpose. For example:
- Patios: Extend your living space outdoors, perfect for entertaining.
- Pathways: Guide foot traffic and connect different areas of your garden.
- Retaining Walls: Prevent soil erosion and add depth to flat landscapes.
By focusing on functionality, hardscape design not only improves the usability of your outdoor space but also increases property value.
Aesthetics
Aesthetics in hardscape design is about creating a harmonious blend between the man-made and natural elements. This involves:
- Color Coordination: Matching hardscape colors with the surrounding landscape for a cohesive look.
- Texture Variation: Using different textures to add interest and depth.
- Focal Points: Creating visual interest through features like water fountains or fire pits.
A well-designed hardscape will draw the eye and create a welcoming atmosphere.

In summary, understanding hardscape design is about balancing material selection, functionality, and aesthetics to transform outdoor spaces into beautiful, practical environments. This balance is what makes hardscape design both an art and a science.
The Role of Hardscape Designers
Hardscape designers play a crucial role in changing outdoor spaces. Their expertise lies in creating environments that are both functional and beautiful. Let’s explore how they achieve this through their design process, landscape integration, and maintenance reduction.
Design Process
The design process begins with understanding the client’s vision and needs. Hardscape designers work closely with homeowners to translate their ideas into reality. This involves:
- Initial Consultation: Discussing goals, preferences, and budget.
- Site Evaluation: Assessing the landscape for challenges like slopes or drainage issues.
- Conceptual Design: Creating sketches or digital models to visualize the project.
This collaborative approach ensures that the final design aligns with the homeowner’s vision while being practical and feasible.
Landscape Integration
A key aspect of hardscape design is integrating man-made elements with the natural landscape. This requires a careful balance to ensure harmony between the two. Hardscape designers achieve this by:
- Blending Materials: Choosing materials that complement the natural surroundings, such as using local stone for a more cohesive look.
- Strategic Placement: Positioning features like patios and pathways to improve the flow of the landscape.
- Preserving Nature: Incorporating existing trees and plants into the design to maintain the natural beauty of the area.
By thoughtfully integrating hardscape elements, designers create spaces that feel like a natural extension of the environment.
Maintenance Reduction
One of the benefits of hardscaping is reduced maintenance compared to traditional landscapes. Hardscape designers focus on creating low-maintenance solutions by:
- Selecting Durable Materials: Using long-lasting materials like concrete and stone that require minimal upkeep.
- Implementing Smart Design: Designing features like drainage systems to prevent water damage and erosion.
- Minimizing Lawn Areas: Reducing grass coverage to decrease mowing and watering needs.
These strategies not only save time and effort for homeowners but also contribute to the sustainability of the landscape.
In conclusion, hardscape designers are essential in crafting outdoor spaces that are functional, beautiful, and easy to maintain. Their expertise in design, integration, and maintenance ensures that each project is custom to the client’s needs and the natural environment.
Key Elements of Hardscape Design
When it comes to hardscape design, several elements form the backbone of a well-thought-out outdoor space. Let’s explore the key components: patios, decks, pathways, and retaining walls.
Patios
Patios are versatile outdoor living spaces perfect for relaxation and entertainment. They can be crafted from various materials like concrete, pavers, or natural stone, each offering its unique aesthetic.
- Material Selection: Choose materials that complement your home’s architecture and landscape. For example, natural stone provides a timeless look, while pavers offer a wide range of colors and patterns.
- Functionality: Consider how you plan to use the patio. Will it host large gatherings or intimate family dinners? This will influence the size and layout.
Decks
Decks provide an liftd platform for enjoying the outdoors. They’re ideal for sloped yards or areas with stunning views.
- Design Considerations: Choose between wood and composite materials. Wood offers a traditional look, while composite is low-maintenance and durable.
- Safety Features: Incorporate railings and steps to ensure safety, especially if the deck is high off the ground.
Pathways
Pathways guide visitors through your landscape, connecting different areas and adding visual interest.
- Materials and Styles: Options include gravel, flagstone, brick, or concrete. Each material has its texture and feel, impacting the overall ambiance.
- Layout: Curved pathways create a natural flow, while straight paths offer a formal look. Consider the landscape’s layout when designing the path.
Retaining Walls
Retaining walls are both functional and decorative, providing support for sloped areas and adding dimension to the landscape.
- Material Choices: Use materials like concrete blocks, bricks, or natural stone to match the aesthetic of your outdoor space.
- Design Tips: Retaining walls can also serve as seating areas or planters, adding extra functionality.
Each of these elements plays a crucial role in the overall design and functionality of your outdoor space. By carefully selecting and integrating these features, you can create a cohesive and inviting environment that meets your needs and improves your landscape’s beauty.
Next, let’s explore expert tips for successful hardscape projects, focusing on budgeting, planning, and material selection.
Expert Tips for Successful Hardscape Projects
Creating a stunning hardscape design involves more than just picking materials and laying them down. It requires careful planning and budgeting to ensure a successful project. Here are some expert tips to guide you through the process.
Budgeting
Start with a Realistic Budget: Knowing how much you’re willing to spend is crucial. Hardscaping can range from a few hundred to several thousand dollars, depending on the project’s size and complexity. Always plan for unexpected costs by setting aside a contingency fund.
- Average Costs: While prices vary, expect to pay more for materials like natural stone compared to concrete or pavers. These are average costs based on internet data and not actual costs for Marchi Paving.
Planning
Define Your Goals: Before starting, clearly outline what you want to achieve with your hardscape. Are you looking to create an entertainment area, improve curb appeal, or add functionality?
- Site Assessment: Evaluate your property’s existing conditions. Consider factors like soil type, drainage, and the natural slope of the land. This will help in deciding which hardscape elements are feasible.
Design with Purpose: Every element in your hardscape should serve a purpose, whether it’s aesthetic or functional. For example, retaining walls not only add dimension but also prevent soil erosion.
Material Selection
Choose Durable Materials: The longevity of your hardscape depends on the materials you choose. Opt for durable options that can withstand your area’s climate. For instance, pavers are a popular choice due to their durability and variety of design options.
- Aesthetic Compatibility: Ensure that the materials complement your home’s architecture and existing landscape. This creates a harmonious look that improves the overall appeal of your outdoor space.
Consider Maintenance: Some materials require more upkeep than others. For instance, wood decks may need regular sealing, while composite decks are more low-maintenance. Choose materials that align with the amount of maintenance you’re willing to perform.
By following these expert tips on budgeting, planning, and material selection, you can ensure that your hardscape project not only meets your expectations but also improves the beauty and functionality of your outdoor space.
Next, we’ll address some frequently asked questions about hardscape design, including how much you should spend and what a hardscape designer does.
Frequently Asked Questions about Hardscape Design
How much should you spend on a hardscape?
When planning a hardscape project, budgeting is a key step. Costs can vary widely based on the type and scale of the project.
- Cost Per Square Foot: On average, hardscaping can cost anywhere from $15 to $50 per square foot. However, for more intricate designs or high-end materials like natural stone, costs can exceed $100 per square foot. These figures are based on internet data and not actual costs for Marchi Paving.
- Project Types: Simple projects like gravel pathways or small patios may fall on the lower end of the price spectrum. In contrast, complex projects such as outdoor kitchens or multi-tiered retaining walls will be more expensive due to the materials and labor involved.
What is a hardscape designer?
Hardscape designers specialize in creating outdoor spaces using non-living materials. Their expertise lies in integrating these elements seamlessly into the landscape to improve both functionality and aesthetics.
- Non-Living Materials: These include stone, brick, concrete, and metal, which are used to build structures like patios, walkways, and fire pits.
- Landscape Integration: A skilled hardscape designer ensures that the hardscape elements complement the surrounding landscape, creating a cohesive outdoor environment. This involves careful planning and understanding of the existing natural features.
Are landscape architects worth it?
Hiring a landscape architect can be a valuable investment for your outdoor projects.
- Career Satisfaction: Many landscape architects find great satisfaction in their work, as they have the opportunity to transform outdoor spaces into beautiful and functional environments.
- Environmental Impact: Landscape architects often prioritize sustainable practices, such as using eco-friendly materials and incorporating native plants, which can reduce maintenance and benefit the local ecosystem.
In summary, understanding the costs, roles, and benefits of hardscape design can help you make informed decisions for your outdoor projects. Whether it’s working with a hardscape designer or considering the impact of your design choices, these insights will guide you in creating a space that meets your needs and improves your property.
Conclusion
At Marchi Paving Inc., we pride ourselves on delivering exceptional hardscape projects that stand the test of time. Our commitment to quality and precision is evident in every project we undertake. With over 20 years of experience, we have honed our skills in using advanced equipment and high-quality materials, ensuring each project is executed flawlessly.
Project Execution is at the heart of what we do. We manage every aspect of your hardscape project in-house, from initial design to final installation. This allows us to maintain strict quality control and ensure that each detail meets our high standards. Our team of skilled professionals works closely with you to understand your vision and bring it to life, creating outdoor spaces that you can enjoy for years to come.
Our use of advanced equipment sets us apart from the competition. By investing in state-of-the-art machinery, we improve the efficiency and precision of our work. This technology enables us to complete projects on schedule and within budget, without compromising on quality. Whether it’s a simple patio or a complex retaining wall, our equipment ensures that the end result is both beautiful and durable.
Choosing Marchi Paving Inc. means partnering with a team dedicated to excellence. Our expertise in hardscaping, combined with our commitment to customer satisfaction, makes us the go-to choice for changing your outdoor spaces. Ready to start your hardscape project? Contact us today to experience the Marchi Paving difference.
Retaining Wall Design: Top 5 Powerful Tips for 2025
Retaining wall design is an essential aspect of landscape architecture and civil engineering that focuses on creating structures to hold back soil and prevent erosion. These walls not only improve the aesthetic appeal of a property but also provide critical structural support and improve land usability. Understanding the intricacies of retaining wall design can guide property owners and managers in selecting the right wall type, ensuring safety and longevity. Here’s what you need to know:
- Purpose: Retain soil, prevent erosion, and improve land use.
- Types: Gravity, cantilever, embedded, and reinforced soil walls.
- Design Elements: Stability, drainage, and soil pressure considerations.
- Materials: Concrete blocks, stones, or boulders.
Marchi Paving Inc., based in Massachusetts, offers expert design and installation services for retaining walls that seamlessly blend function with visual appeal. They focus on high-quality construction practices to ensure your retaining wall stands the test of time, addressing common concerns like soil pressure and drainage to minimize future maintenance.
To effectively transform your landscape with the right retaining wall, Marchi Paving Inc. combines both creativity and technical expertise, making them a trusted partner in the Middlesex County area.

Basic Principles of Retaining Wall Design
Designing a retaining wall involves understanding key principles that ensure the wall’s effectiveness and longevity. At the heart of this process are concepts like reinforced concrete, cantilever structures, and the importance of footings.
Reinforced Concrete and Cantilever Structures
Reinforced concrete is a staple in retaining wall construction. It’s strong, durable, and can withstand significant pressure from the soil it retains. The use of steel reinforcement within the concrete helps the wall resist bending and cracking under load.
Cantilever retaining walls are a popular choice for their efficiency. They use a vertical stem and a horizontal base slab, creating a shape that naturally resists tipping. The base is split into two parts: the heel (under the soil) and the toe (on the opposite side). This design allows the weight of the retained soil to help stabilize the wall.
Footings and Stability
Properly designed footings are crucial for stability. They distribute the wall’s load across a broader area, reducing the risk of the wall sinking or shifting. Footings must be placed on firm, undisturbed soil to provide a stable foundation.
Overturning and Sliding
Two major concerns in retaining wall design are overturning and sliding. Overturning occurs when the wall tips over due to excessive pressure from the retained soil. To prevent this, the wall’s weight and shape must counterbalance the soil pressure.
Sliding happens when the entire wall moves horizontally. This can be avoided by ensuring that the wall’s base is wide enough and that the friction between the base and the soil is sufficient to resist lateral forces.
Soil Bearing Capacity
Understanding the soil bearing capacity is essential. This refers to the soil’s ability to support the wall’s weight without excessive settlement. If the soil is too weak, it may need to be replaced or reinforced to ensure the wall’s stability.
By mastering these principles, designers can create retaining walls that not only serve their purpose but also remain safe and durable over time. Marchi Paving Inc. excels in applying these principles to deliver high-quality retaining walls that meet both functional and aesthetic needs.
Next, we’ll explore the different types of retaining walls and their specific applications.
Types of Retaining Walls
When designing a retaining wall, it’s crucial to choose the right type for your specific needs. Each type has unique features and benefits, custom to different situations. Here, we’ll explore four common types: gravity retaining walls, cantilever retaining walls, embedded retaining walls, and reinforced soil retaining walls.
Gravity Retaining Walls
Gravity retaining walls rely on their own weight to hold back soil. They are typically made from heavy materials like concrete, stone, or brick. These walls are straightforward to construct and are best suited for low-height applications.
Their simplicity makes them a popular choice for DIY projects, but they require a firm foundation to prevent sliding or toppling. The weight of these walls provides the stability needed to resist lateral earth pressure.
Cantilever Retaining Walls
Cantilever retaining walls are a more efficient design, using a thin stem and a base slab that extends into the retained soil. This design uses the weight of the soil on the heel to stabilize the wall.
These walls are ideal for medium to high-height applications. They require less material than gravity walls, making them cost-effective for larger projects. As mentioned earlier, their design naturally resists tipping, making them a popular choice for many retaining wall projects.
Embedded Retaining Walls
Embedded retaining walls are installed by driving them into the ground. They are often used in areas with limited space or when dealing with deep excavations.
Common materials for these walls include steel, concrete, or timber. They are particularly useful in urban environments where space is at a premium. The depth to which they are driven provides the stability needed to support significant loads.
Reinforced Soil Retaining Walls
Reinforced soil retaining walls integrate soil with reinforcement materials like geogrids or geotextiles. These walls are flexible and can accommodate a variety of shapes and heights.
This type of wall is ideal for projects requiring a natural appearance, as they can be covered with vegetation. They offer excellent stability and are often used in landscaping projects to create terraces or slopes.
Choosing the right type of retaining wall is crucial for ensuring stability and functionality. Each type has its own set of advantages, making them suitable for different scenarios. In the next section, we’ll walk through the step-by-step process of designing a retaining wall, from selecting the location to calculating the total wall structure.
Step-by-Step Retaining Wall Design Process
Designing a retaining wall involves several critical steps to ensure it functions effectively and safely. Let’s break down the process into clear, manageable tasks.
Selecting the Retaining Wall Location
Choosing the right location is the first step in the design process. Here are some key considerations:
- Soil Excavation and Backfill: Minimize both to save on costs and reduce environmental impact.
- Grading and Drainage: Ensure proper grading to direct water away from the wall, preventing erosion and water damage.
- Site Features: Consider existing structures, trees, and utilities that might affect the wall’s placement.
Determining Wall Height and Geometry
Once the location is set, focus on the wall’s height and shape:
- Wall Height: Calculate the height at the tallest point. This will help determine the wall’s structural requirements.
- Slopes: Identify any slopes above or below the wall, as they can affect stability.
- Surcharges: Account for additional loads such as traffic or construction equipment.
- Wall Batter and Setback: Choose a suitable angle and setback to improve stability. The setback chart can guide these decisions.
Evaluating Structural Requirements
Next, assess the structural needs of the wall:
- Gravity Wall Table: Use this to determine if reinforcement is necessary.
- Geogrid: If required, refer to geogrid charts for guidance on grid length and placement.
- Allan Block Engineering Manual: Consult this resource for detailed engineering advice and to address complex structural challenges.
Calculating the Total Wall Structure
Finally, calculate the complete wall structure:
- Setback Chart: Use this to determine the total setback of the wall.
- Grid Lengths: Add required grid lengths to define the wall envelope.
- Wall Envelope: Cross-check the total wall envelope with available space at the site to ensure feasibility.
Designing a retaining wall is a complex task that requires careful planning and consideration of various factors. By following these steps, you’ll be on your way to creating a stable and effective retaining wall. In the next section, we’ll dive into materials and site preparation, ensuring a smooth construction process.
Materials and Site Preparation
Before diving into the construction of a retaining wall, it’s crucial to ensure that all materials are in top condition and the site is well-prepared. This stage sets the foundation for a successful project.
Checking Your Materials
When your materials arrive, it’s important to verify their quality and specifications:
- Block Color and Style: Ensure the blocks match the color and style specified in your design plans. This helps maintain the aesthetic appeal of your retaining wall.
- Setback: Confirm that the blocks align with the setback requirements outlined in the approved plans.
- Geogrid Strength and Specifications: Check the geogrid for strength, weight, and roll size. Make sure it matches the specifications in the engineered plans to ensure structural integrity.
Delivery and Storage
Proper handling and storage of materials prevent damage and contamination:
- Storage Area: Designate a clean, dry area for storing blocks and geogrid. Use wood pallets to keep materials off the ground and protected from moisture.
- Geogrid Protection: Keep the geogrid covered and clean to maintain its strength and effectiveness. Avoid contact with mud or wet concrete.
- Material Contamination: Protect materials from contaminants that could compromise their quality. Damaged or contaminated materials should not be used in the construction process.
Wall Rock and Backfill Soils
The choice of wall rock and backfill soils is vital for stability and longevity:
- Wall Rock Size and Compaction: Use compactible aggregate ranging from 0.25 in. to 1.5 in. (6 mm – 38 mm) with no more than 10% passing the #200 sieve. Proper compaction ensures stability and prevents settlement.
- Backfill Soil Specifications: On-site soils can be used if they meet design specifications. Avoid heavy expansive clays or organic soils, as they can compromise the wall’s integrity.
Foundation Soil Preparation
A solid foundation is the backbone of a stable retaining wall:
- Excavation: Excavate the foundation soil as per the dimensions in the plans. This sets the stage for a level and stable base.
- Compaction: Compact the foundation soil to a minimum of 95% of Standard Proctor to ensure stability.
- Foundation Soil Strength: Have the on-site soils engineer examine the foundation soil to verify it meets or exceeds design strength. Replace any soil that doesn’t meet these requirements with acceptable material.
By carefully preparing materials and the site, you lay the groundwork for a successful retaining wall project. Next, we’ll explore the design of the retaining wall components, focusing on the stem and footing to ensure structural strength and durability.
Designing the Retaining Wall Components
When designing a retaining wall, the stem and footing are critical components. These parts work together to counteract the forces exerted by the soil and other external pressures.
Designing the Stem
The stem of a retaining wall is the vertical component that holds back the soil. It must be designed to withstand various forces:
- Bending and Shear Forces: The stem experiences bending due to lateral earth pressures. These pressures can be calculated using theories like Rankine or Coulomb, which help determine the lateral force distribution. Shear forces, on the other hand, occur due to the weight of the soil and any additional loads on the wall.
- Triangular Distribution: Earth pressure against the wall is typically distributed in a triangular shape, with the maximum pressure at the base. This distribution is crucial for calculating the bending moments and shear forces that the stem must resist.
- Surcharge Pressure: Additional loads, such as vehicles or structures near the wall, create surcharge pressure. This pressure needs to be considered in the design to prevent unexpected failures.
- Seismic Pressure: In seismic zones, the Mononobe-Okabe approach can be used to account for additional pressures due to earthquakes. This ensures the wall remains stable during seismic events.
Designing the Footing
The footing provides the base support for the retaining wall and includes the heel, toe, and sometimes a shear key:
- Heel and Toe: The footing extends both behind (heel) and in front (toe) of the wall. The heel counteracts the overturning forces, while the toe helps resist sliding. Proper sizing of these components is essential for wall stability.
- Soil Bearing Pressure: The pressure exerted by the wall and retained soil onto the foundation soil must not exceed the soil’s bearing capacity. Ensuring this prevents excessive settlement and potential failure.
- Reinforcing Steel: Reinforcement is crucial for countering tensile forces within the footing. Steel bars are typically placed in both the stem and footing to improve strength and ductility.
- Shear Key: Sometimes a shear key is added beneath the footing to increase resistance against sliding. This is especially useful in areas with weaker soils or higher lateral loads.
By carefully designing the stem and footing, a retaining wall can effectively manage the forces it encounters, ensuring long-term stability and durability.
Next, we’ll address frequently asked questions about retaining wall design, providing further insights into the principles and practices that underpin successful projects.
Frequently Asked Questions about Retaining Wall Design
What is the basic rule of retaining wall design?
The basic rule for retaining wall design is ensuring stability against various forces. A well-designed wall must resist:
- Overturning: This occurs when lateral earth pressure tries to tip the wall over. To counteract this, the wall’s weight and its footing design must provide enough resistance.
- Sliding: The wall must not slide forward. This is achieved by ensuring the base friction and any additional features like a shear key provide sufficient resistance.
- Bearing Capacity: The pressure from the wall and retained soil on the foundation soil should not exceed the soil’s bearing capacity to avoid sinking or tilting.
What is the formula for retaining wall design?
Designing a retaining wall involves several calculations. Key formulas include:
- Earth Pressure: Calculated using Rankine or Coulomb theories. These formulas consider soil properties, wall inclination, and wall friction to determine lateral earth pressure.
- Stability Check: Ensures the wall can handle overturning, sliding, and bearing capacity forces. A safety factor of 1.5 is commonly used for these checks.
What are the 4 types of retaining walls?
There are four primary types of retaining walls, each with unique characteristics:
- Gravity Retaining Walls: These rely on their weight to resist earth pressure. They are typically made from heavy materials like concrete or stone.
- Cantilever Retaining Walls: Use a reinforced concrete stem and footing. The wall acts as a lever, with the footing providing resistance to overturning and sliding.
- Embedded Retaining Walls: These are driven into the ground and rely on the surrounding soil for support. They are ideal for deep excavations.
- Reinforced Soil Retaining Walls: Use layers of soil and reinforcement (like geogrids) to create a stable structure. They are flexible and can accommodate movement without cracking.
Each type of wall serves different needs and site conditions, making it crucial to choose the right one for your project.
By understanding these fundamentals, you can ensure your retaining wall is designed for strength, durability, and effectiveness.
Conclusion
Retaining walls are more than just structures; they are essential elements in landscape and structural design. Their primary function is to hold back soil and prevent erosion, but they also add aesthetic value and define spaces within a landscape.
Marchi Paving Inc. is committed to delivering high-quality retaining wall design and construction services. With over 20 years of experience, our team ensures that each project is executed with precision and care. We understand the importance of selecting the right materials, designing for stability, and adapting to the unique conditions of each site.
Our approach begins with a thorough assessment of the site to determine the best location for the wall, minimizing excavation and optimizing drainage. We then move to calculating the wall’s height and geometry, considering factors like slopes and surcharges. Our expertise in evaluating structural requirements ensures that each wall is built to withstand the forces of nature.
Materials and site preparation are critical. We ensure that all materials meet our high standards and are stored properly to maintain their quality. The use of wall rock and proper backfill soils is crucial for the wall’s longevity and effectiveness.
Designing the components of the wall, such as the stem and footing, is where our attention to detail shines. We consider bending and shear forces, soil bearing pressure, and reinforcing steel placement to create a robust and reliable structure.
For those seeking a partner they can trust for their hardscaping needs, Marchi Paving Inc. is here to help. Our dedication to quality and customer satisfaction ensures that your retaining wall will not only meet but exceed your expectations.
In summary, retaining walls are vital for both function and form. With the right design and construction, they can improve the beauty and stability of your landscape. Marchi Paving Inc. is proud to offer expertise and excellence in every project we undertake.
MA Driveway Paving: 5 Easy Steps to Success 2025
MA driveway paving is an essential project for enhancing both the appearance and functionality of your property, but before you begin, understanding the permit requirements in Massachusetts is crucial. To get started on your journey to a smoothly paved driveway, here are key points to know:
- Permit Essentials: Before starting a driveway paving project in Massachusetts, securing the necessary permits is vital. This ensures compliance with local zoning codes and environmental regulations.
- Why Permits Matter: These permits safeguard your investment by addressing important aspects like drainage and structural integrity, preventing potential future complications.
- Steps to Obtain a Permit: Typically, the process involves submitting an application with details about your project, ensuring adherence to local guidelines, and getting approvals from the necessary authorities.
In Massachusetts, the need for permits for driveway paving projects can vary by locality but getting it right from the start protects both your project and your property value.
Securing a permit not only helps avoid legal issues but also assures that the work meets high standards of quality and durability. In the sections that follow, we’ll dig deeper into the specific steps and considerations to help you steer the permit process smoothly.

Essential ma driveway paving terms:
– asphalt driveways
– driveway sealing companies near me
– paving company
Understanding Permit Requirements
When starting on a MA driveway paving project, navigating the permit requirements is crucial. Here’s a breakdown of what you need to know:
Zoning Code Review
Zoning codes are local regulations that dictate how land can be used in certain areas. For driveway paving, these codes ensure that your project aligns with community standards and land use plans. It’s essential to check with your local zoning office to understand specific requirements for your area. This might include restrictions on driveway width, materials, or proximity to property lines.
Stormwater Review
Massachusetts places a strong emphasis on managing stormwater to prevent flooding and protect water quality. A stormwater review assesses how your paving project will impact drainage and runoff. Proper drainage solutions, like those mentioned in the research, such as permeable paving, can help manage water flow and prevent damage to your property and surrounding areas.
Residential and Commercial Properties
Permit requirements can differ significantly between residential and commercial properties:
- Residential Properties: These projects often require a simpler permitting process. However, ensuring compliance with setbacks and drainage requirements is still critical.
- Commercial Properties: Paving projects for commercial properties are typically subject to more stringent regulations. These may involve detailed site plans and environmental impact assessments to ensure the project does not adversely affect the surrounding area.
By understanding these key aspects of the permit process, you can ensure your MA driveway paving project proceeds smoothly and meets all necessary legal and environmental standards. Next, we’ll guide you through the specific steps to secure your driveway paving permit.
Steps to Secure Your Driveway Paving Permit
Securing a permit for your MA driveway paving project involves several key steps. Let’s walk through the process to make it as straightforward as possible.
Application Process
- Contact Your Local Permit Office: Begin by reaching out to your town or city’s permit office. They will provide specific details on what’s required for your application. Each locality may have unique requirements, so start here.
- Complete the Application Form: Fill out the driveway paving permit application form. This form typically asks for information about the property, the scope of the project, and the materials you plan to use.
- Submit the Application: Once completed, submit your application along with any required fees. This can often be done online or in person. Be sure to keep a copy for your records.
Documentation
Proper documentation is crucial to avoid delays in the permit process.
- Site Plan: A detailed site plan is often required. This plan should include the dimensions of the driveway, location on the property, and any existing structures. It helps officials understand how the project fits into the surrounding area.
- Materials List: Provide a list of materials you plan to use, such as asphalt or permeable paving. This ensures compliance with local standards and regulations.
- Stormwater Management Plan: If your area is prone to heavy rainfall, a stormwater management plan may be necessary. This document outlines how you will handle water runoff, which is crucial for preventing flooding and protecting water quality.
Local Regulations
Understanding local regulations is key to a successful application.
- Zoning Laws: Ensure your project complies with zoning laws, which might dictate driveway width, length, and proximity to property lines. These laws help maintain neighborhood aesthetics and property values.
- Environmental Regulations: Massachusetts places a strong emphasis on environmental protection. Your project may need to meet specific environmental standards, particularly concerning stormwater management.
- Historical Districts: If your property is in a historical district, additional regulations may apply. These can include restrictions on materials and design to maintain the historical character of the area.
By following these steps and ensuring all documentation is in order, you can streamline the permit process for your MA driveway paving project. Next, we’ll explore the cost considerations involved in paving your driveway.
Cost Considerations for MA Driveway Paving
When planning your MA driveway paving project, understanding the costs involved is crucial. Here’s a breakdown of the main cost factors, keeping in mind that these are average costs based on internet data and not actual costs for Marchi Paving:
Asphalt Costs
Asphalt is a popular choice for driveways due to its durability and smooth finish. However, prices can vary widely based on several factors:
- Material Quality: Higher-quality asphalt will cost more but offers better longevity and performance. Average costs can range significantly, with the high end being at least 3x the average pricing.
- Thickness: Driveways intended for heavy vehicles may require thicker asphalt, increasing the cost.
- Regional Variations: Prices can differ based on location. It’s wise to get quotes from local contractors to understand the average cost in your area.

Removal Costs
If your project involves replacing an old driveway, removal costs will be part of your budget. These costs depend on:
- Existing Material: Removing concrete can be more labor-intensive and costly than asphalt or gravel. Average costs can vary widely, with the high end being at least 3x the average pricing.
- Driveway Size: Larger driveways will naturally incur higher removal costs due to the increased amount of material.
- Accessibility: Difficult-to-reach areas may require special equipment, adding to the cost.
Labor Costs
Labor is a significant part of your driveway paving budget. Skilled labor costs include:
- Preparation Work: This involves grading, ensuring proper drainage, and removing old materials.
- Installation: Laying down the asphalt and compacting it to the right thickness. This step is crucial for a smooth, long-lasting surface.

Additional Considerations
In addition to material or labor, other factors can affect your overall costs:
- Permits and Inspections: Depending on your location, you may need to budget for permits and any required inspections.
- Weather Conditions: Seasonal variations can impact the timing and cost of your project. Some contractors may offer discounts during off-peak seasons, but be aware that weather conditions might not be ideal for paving during these times.
By understanding these cost factors, you can make informed decisions and budget effectively for your MA driveway paving project. Next, we’ll explore eco-friendly paving options that not only benefit the environment but can also offer long-term cost savings.
Eco-Friendly Paving Options
Many homeowners are looking for ways to make their properties more sustainable, and MA driveway paving is no exception. Let’s explore some eco-friendly paving options that not only help the environment but can also improve the beauty and functionality of your driveway.
Permeable Paving
Permeable paving is a fantastic choice for those who want to reduce stormwater runoff and promote groundwater recharge. These pavers are designed with spaces between them, allowing water to seep through and into the ground. This not only helps prevent erosion but also reduces the burden on local stormwater systems.
- Materials: Options include concrete, clay, and recycled materials. Each offers durability with an eco-friendly twist.
- Benefits: By allowing water to filter through, permeable pavers help maintain the natural water cycle and reduce the heat island effect often associated with traditional asphalt or concrete surfaces.
Green Driveway Ideas
Going green with your driveway doesn’t mean sacrificing style or functionality. Here are some innovative ideas:
- Solid Paving with Joints: This looks like regular paving but includes small joints filled with a plastic grid beneath. Water trickles through these joints, promoting soil absorption.
- Green Paving: These pavers have an open grid design where grass or other durable plants can grow. This reduces heat and provides a natural aesthetic.
- Porous Asphalt: Similar to traditional asphalt but with a more porous mixture, allowing water to soak through.
Drainage Solutions
Proper drainage is key to maintaining a healthy and long-lasting driveway. Here are some effective solutions:
- French Drains: A trench filled with gravel or rock and a perforated pipe that redirects water away from your property. It’s a popular choice for its effectiveness and simplicity.
- Catch Basins: Installed at low points, these collect and control surface water runoff, preventing pooling and potential flooding.
- Swales: These are shallow, wide channels that redirect water, often used alongside driveways to manage water flow and prevent erosion.
By considering these eco-friendly paving options, you not only contribute to a healthier environment but also add unique features to your property. Next, we’ll address some frequently asked questions about MA driveway paving to help you better understand the process.
Frequently Asked Questions about MA Driveway Paving
Do you need a permit to pave a driveway in MA?
Yes, in Massachusetts, you generally need a permit to pave a driveway. The permit application process involves several steps to ensure compliance with local regulations.
- Zoning Code: Before applying, check your local zoning code. This ensures your paving project aligns with municipal guidelines, such as driveway width and location.
- Stormwater Review: Massachusetts requires a stormwater review to manage runoff effectively. This is crucial to prevent flooding and erosion, especially in areas with heavy rainfall.
To start the permit process, contact your local building department. They will guide you on the necessary documentation, which may include site plans and stormwater management proposals.
How much does it cost to pave a driveway in MA?
The cost of paving a driveway in Massachusetts varies widely based on several factors:
- Asphalt Costs: Asphalt is a popular choice for its durability and sleek appearance. Average costs can range from $3 to $9 per square foot, but remember, the upper end can go much higher depending on specific requirements.
- Removal Costs: If you have an existing driveway that needs removal, this can add to the expense. Removal costs might range from $1 to $3 per square foot.
- Labor Costs: Labor is a significant part of the budget. In Massachusetts, labor costs can average around $50 to $100 per hour, depending on the complexity of the job and local rates.
Always get multiple quotes to ensure you’re getting a fair deal. Also, consider that off-peak seasons might offer reduced rates.
What is the cheapest pavement for a driveway?
If budget is a concern, gravel is often the most cost-effective option for driveway paving.
- Gravel Costs: Gravel driveways can start as low as $1 to $3 per square foot. This makes it an affordable choice for many homeowners.
- Benefits: Gravel is not only economical but also easy to install and maintain. It provides good drainage and can be replenished easily when needed.
While gravel is cost-effective, it might not be suitable for all climates or heavy-use areas. Consider your specific needs and consult with a professional to determine the best option for your MA driveway paving project.
Next, we’ll explore how Marchi Paving Inc. ensures high-quality execution with advanced equipment.
Conclusion
When it comes to MA driveway paving, choosing the right contractor can make all the difference. At Marchi Paving Inc., we pride ourselves on delivering high-quality execution that stands the test of time. Our commitment to excellence is evident in every project we undertake.
High-Quality Execution
Experience and attention to detail are key. With over 20 years in the industry, our team knows how to get the job done right. We handle every aspect of the project in-house, ensuring strict quality control. This means you can trust us to meet—and often exceed—your expectations.
Advanced Equipment
We believe that great results start with the right tools. That’s why we invest in advanced equipment to improve the efficiency and precision of our work. Our state-of-the-art machinery allows us to complete projects on schedule and within budget, without compromising on quality.
Whether you’re interested in traditional asphalt, eco-friendly options, or something in between, we have the expertise to make your vision a reality. Our dedication to using top-notch materials and equipment ensures your driveway will not only look fantastic but will also last for years to come.
Ready to start your project? Contact us today to experience the Marchi Paving difference. Let us help you achieve a durable, beautiful driveway that improves your home’s curb appeal.
Do It Yourself Landscape Drainage Solutions: Top 6 Hacks
Do it yourself landscape drainage solutions can be your ticket to a hassle-free and water-friendly yard. Whether you’re dealing with stubborn puddles or just want to improve your home’s curb appeal, swift action is vital. Here’s a quick rundown to get you started:
- Install a French drain: A simple trench filled with gravel and a pipe to redirect water.
- Dig a dry well: A hidden reservoir that captures excess water and lets it seep back into the ground.
- Create a rain garden: A patch with plants that thrive in both dry and wet conditions, directing rainfall efficiently.
- Extend your downspout: A straightforward fix to guide rainwater further away from your foundation.
Proper yard drainage does more than prevent a swampy mess. It protects your home’s foundation from potential water damage. A moist foundation can lead to costly repairs and safety issues. By managing your drainage right, you improve your yard’s beauty and maintain your property value.
Your weekend DIY project could be the key to sidestepping serious problems down the line—accept these strategies and watch your yard transform. Enjoy your outdoor space without the fear of foundation damage or waterlogged lawns slowing you down.

Find more about do it yourself landscape drainage solutions:
– diy yard drainage solutions
– landscape and drainage solutions
– home drainage solutions
Understanding Yard Drainage
When it comes to yard drainage, understanding the basics can save you from a soggy mess. Let’s break down the essentials, starting with the yard slope.
Yard Slope
Your yard’s slope plays a big role in how water moves. Ideally, your yard should slope away from your house. This helps direct water away from your foundation, preventing damage. If your yard slopes towards your home, it can lead to pooling water and potential foundation issues.
A simple way to check your yard’s slope is by observing water flow during a rainstorm. If you notice water pooling near your home, it might be time to consider regrading your yard.
Impacted Soil
Impacted soil is another common culprit in poor drainage. When soil becomes compacted, it loses its ability to absorb water effectively. This results in surface runoff and standing water.
To combat compacted soil, consider aerating your lawn. Aeration involves creating small holes in the soil to improve air and water movement. This simple step can greatly improve your yard’s drainage.
Short Gutter Downspout
A short gutter downspout can also contribute to drainage problems. If your downspout ends too close to your home, it can lead to water pooling around your foundation.
Extending your downspout is a quick fix. By directing water further away from your home, you reduce the risk of foundation damage and soggy yards.

Understanding these elements of yard drainage can help you identify and tackle issues before they escalate. By addressing yard slope, impacted soil, and short gutter downspouts, you can maintain a healthier and more attractive outdoor space.
Next, we’ll dive into some do it yourself landscape drainage solutions to help you manage water effectively.
Do It Yourself Landscape Drainage Solutions
When tackling yard drainage, there are several do it yourself landscape drainage solutions you can implement to keep your yard dry and your plants healthy. Let’s explore some effective techniques: French drains, dry wells, and rain gardens.
French Drain
A French drain is a simple yet powerful solution for redirecting water away from problem areas. It’s essentially a trench filled with gravel and a perforated pipe that guides water away from your yard.
Here’s how to build one:
- Choose the Right Location: Identify where water tends to pool in your yard. Your French drain should start in this area and lead to a lower elevation point, like a storm drain or dry well.
- Dig the Trench: Use a shovel to dig a trench about 18 inches deep and 12 inches wide. Ensure it slopes downward at least 1 inch for every 10 feet.
- Line with Fabric: Place landscape fabric in the trench to prevent soil from clogging the pipe.
- Add Gravel and Pipe: Fill the trench with a few inches of gravel, lay the perforated pipe, and cover it with more gravel. The pipe should have holes facing down to collect water efficiently.
- Cover and Finish: Fold the fabric over the gravel and cover the trench with soil or sod.

Dry Well
A dry well is another great option for managing excess water. It acts as an underground reservoir, collecting water and allowing it to slowly seep into the surrounding soil.
Steps to Install a Dry Well:
- Choose the Spot: Locate an area where water accumulates and mark the spot for your dry well.
- Dig a Hole: Dig a hole about 4 feet deep. The size may vary based on the volume of water you need to manage.
- Install the Dry Well: Place a pre-made dry well unit or a large container with holes in the hole. Connect it to a French drain or downspout extension.
- Backfill with Gravel: Surround the dry well with gravel to ensure proper drainage.
- Cover and Maintain: Cover the area with soil and plant grass or other vegetation to blend it into your landscape.
Rain Garden
A rain garden is not only functional but also adds beauty to your yard. It uses water-loving plants to absorb and filter runoff.
Creating a Rain Garden:
- Select the Location: Choose a low-lying area that naturally collects water, ideally near a downspout or drainage path.
- Design the Garden: Plan the shape and size of your rain garden. It should be deep enough to hold water temporarily.
- Prepare the Soil: Amend the soil with compost to improve drainage and plant growth. Test soil drainage by filling a small hole with water and observing how quickly it drains.
- Choose Plants: Select native plants that thrive in wet conditions, such as ferns, hostas, and ornamental grasses.
- Plant and Mulch: Arrange plants based on their height and water needs. Add a layer of mulch to retain moisture and prevent erosion.

By implementing these do it yourself landscape drainage solutions, you can effectively manage water in your yard while enhancing its appearance. Whether you opt for a French drain, dry well, or rain garden, these strategies will help you maintain a healthy and attractive outdoor space.
Next, we’ll explore some quick and easy DIY drainage solutions to further improve your yard’s drainage.
Quick and Easy DIY Drainage Solutions
Managing water in your yard doesn’t have to be complicated. Here are some simple do it yourself landscape drainage solutions that can make a big difference.
Aerate Your Lawn
Aerating is a straightforward way to improve drainage. By creating small holes in the soil, you allow air, water, and nutrients to reach the grass roots more effectively.
Steps to Aerate:
- Choose the Right Time: Aerate during the growing season when grass can heal quickly, usually in early spring or fall.
- Rent or Buy an Aerator: Use a manual spike aerator or rent a mechanical one from a local store.
- Prepare the Lawn: Clear the lawn of debris and mow it short before aerating.
- Aerate the Lawn: Walk the aerator across your lawn, focusing on compacted areas.
- Fertilize: After aerating, apply fertilizer to promote healthy growth.
Add More Dirt
Adding dirt is a simple fix for low spots where water pools.
How to Add Dirt:
- Identify Low Areas: Look for spots where water collects after rain.
- Add Topsoil: Spread a layer of topsoil over these areas and rake it smooth.
- Check the Grade: Ensure the ground slopes away from your home’s foundation. Aim for a slope of about 1 inch per foot.
- Compact the Soil: Lightly compact the soil to prevent future settling.
Extend Downspouts
Extending downspouts can redirect water away from your foundation, reducing the risk of leaks and erosion.
Steps to Extend:
- Inspect Existing Downspouts: Check for blockages and ensure they are securely attached.
- Choose an Extension: Use a flexible or rigid downspout extension.
- Attach the Extension: Secure it to the downspout and direct it away from the house. Aim towards a storm drain or dry well, never towards a neighbor’s property.
- Seal Joints: Use waterproof sealant to prevent leaks.
These quick fixes are easy to implement and can have a significant impact on your yard’s drainage. Next, we’ll dive into some advanced DIY drainage techniques for those ready to tackle bigger projects.
Advanced DIY Drainage Techniques
When simple fixes aren’t enough, it’s time to level up with some advanced DIY drainage techniques. These methods not only improve drainage but also improve your yard’s aesthetic appeal.
Creek Bed
A creek bed is both functional and beautiful. It channels water away from your home while adding a natural look to your landscape.
Steps to Build a Creek Bed:
- Plan the Path: Use stakes to mark the route. Ensure it slopes gently, about 1 inch per 10 feet.
- Excavate the Trench: Dig a trench along the marked path. Make it wide enough to accommodate rocks and plants.
- Line with Fabric: Lay landscape fabric to prevent weeds and keep the structure intact.
- Add Rocks: Fill the trench with a mix of small rocks and larger stones for a natural look.
- Test the Flow: Run water through the creek bed to ensure it flows smoothly without pooling.
- Improve with Plants: Surround the creek bed with water-loving plants for added beauty.
Swale
A swale is a subtle, grass-covered trench that redirects water. It blends seamlessly into your yard.
How to Create a Swale:
- Identify Low Spots: Find areas where water naturally collects.
- Dig a Shallow Trench: Excavate a gentle slope leading to a safe discharge area.
- Line with Fabric: Use landscape fabric to prevent erosion.
- Fill with Gravel: Add gravel or river rock to help with drainage.
- Plant Grass: Cover with grass to make it blend with the rest of your lawn.
Permeable Paving
Permeable paving allows water to seep through surfaces, reducing runoff and preventing erosion.
Steps to Install Permeable Paving:
- Choose the Material: Options include permeable concrete, pavers, or gravel.
- Prepare the Base: Excavate the area and lay a base of crushed stone for drainage.
- Install Paving: Lay the permeable material, ensuring a tight fit.
- Fill Joints: Use sand or gravel to fill gaps, allowing water to pass through.
- Maintain Regularly: Sweep and clean to prevent clogs and ensure effectiveness.
These advanced techniques not only solve drainage issues but also add value and charm to your property. Up next, we’ll tackle some frequently asked questions about DIY landscape drainage solutions.
Frequently Asked Questions about DIY Landscape Drainage Solutions
How to fix a yard with poor drainage?
Fixing poor drainage in your yard can be simple with the right techniques. One effective method is to aerate your lawn. Aerating involves creating small holes in the soil, allowing air, water, and nutrients to reach grass roots. This process improves soil permeability, reduces runoff, and improves water absorption.
Another great solution is to build a rain garden. A rain garden is a shallow depression filled with water-tolerant plants. It captures and absorbs rainwater runoff from roofs and driveways, preventing water from pooling in your yard. Not only does it improve drainage, but it also adds beauty and supports local wildlife.
What is the best landscape material for drainage?
Choosing the right materials is crucial for effective drainage. River rocks are a popular choice for creating drainage channels or lining creek beds. They allow water to flow freely while adding a natural aesthetic to your landscape.
Base gravel is another excellent material for drainage. It provides a stable foundation for various drainage solutions, such as French drains or trench drains. Its coarse texture ensures water can pass through easily, preventing waterlogging.
How to make landscaping drainage?
Creating effective landscape drainage involves a few key steps. Start by adding topsoil to low areas where water tends to pool. This raises the ground level and helps direct water away from problem spots.
Next, consider installing a trench drain. This involves digging a narrow trench and placing a perforated pipe inside. Cover the pipe with gravel, and then fill the trench with soil or decorative stones. The trench drain collects and redirects water away from your yard, keeping it dry and healthy.
By using these do it yourself landscape drainage solutions, you can tackle common drainage issues and maintain a beautiful, functional yard.
Conclusion
Effective drainage solutions are crucial for maintaining a healthy, beautiful yard. At Marchi Paving Inc., we understand the importance of proper drainage in safeguarding your landscape and home. Our commitment to high-quality execution means we use the best materials and advanced techniques to ensure long-term effectiveness.
Regular maintenance is key to keeping your drainage systems in top shape. Whether it’s clearing debris from gutters, checking for leaks, or ensuring your landscape slopes correctly, staying proactive helps prevent costly repairs down the line. Simple actions, like cleaning your drainage systems regularly or observing water flow after rain, can make a big difference.
For those tackling do it yourself landscape drainage solutions, a little effort goes a long way. From installing French drains to creating rain gardens, these projects not only solve drainage issues but also improve your yard’s appeal.
By choosing Marchi Paving Inc., you’re partnering with a team dedicated to excellence. Our expertise in drainage solutions ensures your property remains safe and dry, season after season.
Ready to protect your landscape from water damage? Contact us today to learn more about our comprehensive drainage solutions and experience the Marchi Paving difference.
Excavating Services: Top 5 Vital Facts for 2025
Why Excavating Services Matter
Excavating services form the backbone of any construction project, whether it’s laying the foundation for a new building or ensuring proper drainage for a residential yard. These services are crucial for:
- Preparing a site for construction by clearing, grading, and trenching.
- Preventing future problems like drainage issues and foundation instability.
- Ensuring the safety and success of the construction project.
Excavation isn’t just about digging; it’s about precision, safety, and foresight. Mistakes like inadequate planning or failing to locate underground utilities can lead to severe consequences, including project delays, safety hazards, and increased costs. As highlighted by experts, proper excavation is essential for maintaining the structural integrity of the project and protecting neighbors’ properties.
By engaging experienced professionals like Marchi Paving Inc., property managers and homeowners in Middlesex County can ensure high-quality and reliable excavation services. This not only guarantees timely project completion but also upholds safety and accessibility.

Excavating services terms to know:
– excavation sitework contractor
– hydrovac excavation companies near me
– septic excavation companies near me
Types of Excavation Services
Excavation is a broad field with many specialized techniques, each designed to handle different challenges. Here’s a breakdown of the primary types of excavating services:
Topsoil Excavation
This involves removing the uppermost layer of soil, which is rich in organic material. It’s typically done to prepare a site for construction or landscaping. By removing this layer, builders can access more stable soil beneath.
Earth Excavation
This type of excavation goes deeper than topsoil excavation. It involves removing soil below the top layer to create foundations and other structures. Earth excavation is essential for projects that require stable support, like buildings and roads.
Rock Excavation
Rock excavation is one of the most challenging types due to the hardness of the material. It often requires specialized machinery and sometimes explosives to break and remove rock. This is common in areas with rocky terrain.
Trench Excavation
Trench excavation involves digging narrow and deep trenches for installing utilities like water, gas, and sewage pipes. Precision is key to avoid disrupting existing infrastructure.
Basement Excavation
For homes with basements, excavation services are necessary to dig out the space below the ground. This requires careful planning to ensure the stability of the surrounding structure.
Cut and Fill Excavation
This process involves cutting away higher areas and filling lower areas to create a level surface. It’s often used in road construction and large-scale landscaping projects.
Slope Excavation
Slope excavation reshapes the land to create slopes or embankments. This is crucial for projects that need to manage water runoff or create terraces.
Dredging
Dredging is the process of removing sediment and debris from bodies of water. This type of excavation is crucial for maintaining waterways and preventing flooding.
Footing Excavation
Footing excavation involves digging out spaces for building foundations. This ensures that structures are built on solid ground, preventing future settlement issues.
Pit Excavation
Pit excavation is used to create large, deep holes for structures like swimming pools or underground storage tanks. It requires precise measurements and planning.
Channel Excavation
This involves creating channels for water flow, which is essential for irrigation and drainage systems. Proper channel excavation prevents waterlogging and erosion.
Trenchless Excavation
Trenchless excavation is a modern technique that minimizes surface disruption. It’s often used for installing or repairing underground utilities without digging up roads or landscapes.
Underwater Excavation
Underwater excavation involves working below water to remove sediment or build underwater structures. This specialized service requires unique equipment and expertise.
By understanding these different types of excavation services, property owners and project managers can choose the right method for their needs. This ensures that projects are completed efficiently and safely, minimizing environmental impact and future issues.
Key Components of Excavation Projects
When starting on an excavation project, several key components ensure everything goes smoothly from start to finish. These steps are crucial for laying a solid foundation, literally and figuratively, for any construction project.
Preparation
Preparation is the first step in any excavation project. This involves thoroughly inspecting the site to understand what’s beneath the surface, including gas lines, pipes, and other utilities. It’s also important to clear the area of vegetation and debris to make way for the upcoming work. As the saying goes, “measure twice, cut once”—proper preparation can save time and prevent costly mistakes down the line.
Staking Out
Once the site is prepped, the next step is staking out the area. This involves marking the precise boundaries and dimensions of the excavation site. Contractors often use white marking paint to outline the area. Double-checking measurements during this phase is essential to ensure accuracy before any digging begins.

Equipment
The right equipment is crucial for successful excavation. Depending on the project’s size and scope, various machines like excavators, backhoes, and trenchers may be required. Selecting the appropriate machinery ensures efficiency and reduces the risk of damage to the site. Experienced operators are key to utilizing this equipment effectively.
Excavation
With everything in place, the actual excavation begins. This is where the heavy machinery comes into play, digging and moving earth to create the desired shape and depth. During this phase, it’s important to monitor the progress closely and adjust as necessary.
Soil Testing
Soil testing is a critical component that should not be overlooked. Understanding the soil’s composition and stability helps in choosing the right excavation methods. It also ensures that the ground can support the weight of the structure being built. Testing can prevent unexpected issues like soil instability, which could lead to structural problems in the future.

Compaction Testing
Once the excavation is complete, compaction testing ensures that the soil is dense enough to support the new structure. This step involves using compactors to press the soil into a stable state. Proper compaction prevents future settling and ensures the longevity of the construction.
By paying attention to these key components, excavation projects can be completed efficiently and safely. This approach minimizes risks and lays the groundwork for successful construction.
Common Residential Excavation Services
Residential excavating services are essential for preparing a site for new construction or improving existing properties. Here are some common types of excavation services that homeowners might need:
Foundation Excavation
Foundation excavation is the first step in building a new home. It involves digging a hole where the house’s foundation will be laid. Proper excavation ensures the foundation is stable and secure. This is crucial because a solid foundation prevents future structural issues.
Trench Excavation
Trench excavation is used for installing utilities like water, sewer, and electrical lines. These trenches need to be precise and deep enough to protect the utilities from potential damage. Proper trenching is important to avoid disruptions in service and ensure safety.
Rock Excavation
Sometimes, construction sites have large rocks or bedrock that need removal. Rock excavation is challenging and requires specialized equipment and expertise. This service is crucial for creating a level building site and preventing structural problems later on.
Drainage Excavation
Proper drainage is vital to prevent water damage to homes. Drainage excavation involves creating systems like French drains or ditches to redirect water away from the property. According to Marchi Paving Inc., these solutions can prevent water pooling and protect your home’s foundation.
Yard Grading
Yard grading involves leveling or sloping the land around a home. This service is important for proper drainage and can improve the appearance of your property. A well-graded yard prevents water from flowing toward your house, protecting the foundation.
New Home Excavation
When building a new home, excavation is one of the first steps. This service involves clearing the land, removing obstacles, and preparing the site for construction. Proper excavation sets the stage for a successful build.
In-Ground Swimming Pools
Excavation for in-ground swimming pools involves digging a large hole where the pool will be installed. This requires precision and expertise to ensure the pool is level and stable. Proper excavation helps prevent future issues like leaks or uneven settling.
Drainage Solutions
In areas prone to heavy rain, drainage solutions are essential. Excavation contractors can create systems that manage stormwater and prevent flooding. These solutions protect your property and keep your landscaping intact.
Basements
Digging a basement is a significant excavation project. It involves removing large amounts of soil to create additional living space below ground level. Proper basement excavation is crucial to prevent water intrusion and ensure structural stability.
These excavating services are vital for any residential construction or improvement project. By understanding these services, homeowners can make informed decisions and ensure their properties are safe and functional.
Next, let’s explore the role of excavating contractors and how they contribute to successful construction projects.
The Role of Excavating Contractors
Excavating contractors play a crucial role in construction projects. They are responsible for transforming a raw piece of land into a ready-to-build site. This involves several critical tasks:
Site Preparation
Before any construction begins, the site must be prepared. This involves clearing the land of trees, rocks, and debris. Excavating contractors also level the site, ensuring it’s suitable for building. Proper site preparation is essential to prevent future structural problems.
Foundation Digging
A solid foundation is the backbone of any structure. Excavating contractors dig the foundation trenches or holes, ensuring they are the right depth and size. This step is vital for the stability and longevity of the building.
Utility Lines
Installing utility lines requires precision. Contractors dig trenches for water, sewer, and electrical lines. They must avoid existing lines and ensure new ones are placed correctly to prevent future disruptions.
Project Planning & Preconstruction
Excavating contractors are involved in the early stages of project planning. They provide insights into soil conditions and potential challenges. This helps in creating a realistic timeline and budget for the project.
Land Alteration & Grading
Land alteration involves changing the landscape to suit the project’s needs. This could mean flattening hills or creating slopes. Grading ensures proper drainage and prevents water from pooling around the structure.
Drainage Correction
Proper drainage is crucial to avoid water damage. Contractors create systems to redirect water away from buildings. This might involve installing French drains or other solutions custom to the site’s needs.
Erosion Control & Soil Remediation
Erosion can cause significant damage to a construction site. Contractors implement measures to prevent soil erosion, such as planting vegetation or using retention walls. Soil remediation involves treating or removing contaminated soil to ensure the site is safe.
Demolition & Land Clearing
Sometimes, existing structures need to be removed before new construction can begin. Excavating contractors handle demolition, ensuring it’s done safely and efficiently. They also clear the land of any debris, making it ready for the next phase.
Each of these tasks is essential for creating a stable and secure foundation for any construction project. By understanding the role of excavating contractors, property owners can appreciate the complexity and importance of their work.
Next, we’ll discuss the costs associated with excavation services and what factors can influence these costs.
Costs Associated with Excavation Services
Understanding the costs associated with excavating services can help you plan your project budget more effectively. Let’s break down the key components that influence these costs.
Average Costs
The cost of excavation services can vary widely depending on the project’s size and complexity. On average, most excavation projects fall between $500 and $15,000. However, specific tasks like land clearing or grading might have different price ranges.
Factors Affecting Cost
Several factors can influence the cost of excavation:
- Site Accessibility and Conditions: Difficult-to-reach sites or those with challenging terrain can increase costs due to the need for specialized equipment and additional labor.
- Soil Composition and Stability: Rocky or unstable soil often requires more effort and machinery, driving up costs. Soil testing might also be necessary to ensure the ground is suitable for building.
- Equipment and Techniques: Projects that require advanced machinery or techniques, such as rock blasting, will generally cost more.
- Site Preparation and Cleanup: Clearing vegetation, removing debris, and disposing of materials all add to the overall cost. Environmental considerations or necessary permits can also impact pricing.
Land Clearing
Clearing land is often the first step in preparing a site for construction. This process involves removing trees, shrubs, and rocks. The average cost to clear land can range from $100 for small, lightly wooded areas to over $11,800 for large, densely wooded properties.
Land Leveling and Yard Grading
Land leveling and yard grading are crucial for ensuring proper drainage and a stable foundation. These tasks involve reshaping the land to suit the project’s needs. The cost can vary based on the land’s condition and the amount of work required. Proper grading prevents water from pooling, which can lead to structural issues.
Basement Entrances
Excavating for basement entrances involves digging and preparing the area to ensure easy access and proper drainage. This task is essential for homes with basements and can influence the overall excavation cost.
Driveway Paving
Preparing the site for driveway paving requires careful excavation to ensure a smooth and even surface. This process might include removing existing structures or materials, grading the area, and compacting the soil. The cost will depend on the driveway’s size and the materials used.
Next, we’ll address some frequently asked questions about excavation services to further clarify this complex topic.
Frequently Asked Questions about Excavating Services
What are the three types of excavation?
Excavation is a broad field, but it generally breaks down into three main types: topsoil excavation, earth excavation, and rock excavation. Each type serves a specific purpose and involves different techniques and equipment.
- Topsoil Excavation: This involves removing the uppermost layer of soil, which is rich in organic material. It’s often done to prepare a site for construction, ensuring a clean slate for building foundations or landscaping.
- Earth Excavation: This goes deeper than topsoil, targeting the removal of soil beneath the surface. This process is essential for creating stable foundations for buildings and infrastructure.
- Rock Excavation: As the name suggests, this involves the removal of rocks, which can be quite challenging. It may require heavy machinery and sometimes explosives, especially in large-scale projects like road construction or mining.
What is the meaning of excavation services?
Excavation services refer to the professional work involved in moving earth, rock, and other materials to prepare a site for construction. This includes using heavy machinery like bulldozers, backhoes, and excavators to dig, move, and remove soil and rock. Safety is a critical aspect of these services, with strict protocols to protect workers and the environment.
What are examples of excavation work?
Excavation work is diverse, covering various projects and techniques. Here are some common examples:
- Trench Excavation: This involves creating narrow trenches for installing utilities like water, gas, or electrical lines.
- Basement Excavation: Digging out space for a basement, which can add valuable living or storage space to a home.
- Cut and Fill Excavation: This technique involves cutting away high areas and filling low areas to create a level surface, often used in road construction.
- Slope Excavation: Adjusting the slope of land for stability or drainage purposes, crucial for preventing erosion.
- Dredging: Removing sediment and debris from bodies of water to maintain navigable waterways or prepare for underwater construction.
- Footing Excavation: Digging for the foundations of buildings, ensuring stability and support for the structure.
- Pit Excavation: Creating pits for various purposes, such as installing underground storage tanks or septic systems.
- Channel Excavation: Shaping channels for water flow, essential for drainage systems and flood prevention.
- Trenchless Excavation: A modern approach that minimizes surface disruption, often used for installing underground utilities.
- Underwater Excavation: Specialized work involving the removal of materials from beneath water bodies, requiring unique skills and equipment.
Each of these examples highlights the versatility and importance of excavation services in construction and infrastructure development. Understanding these can help you choose the right approach for your project.
Next, we will dig deeper into the roles and responsibilities of excavating contractors to provide a clearer picture of what they bring to your construction project.
Conclusion
In construction and infrastructure, excavating services are the backbone that ensures everything stands on solid ground. At Marchi Paving Inc., we pride ourselves on delivering high-quality excavation solutions with over 20 years of experience. Our commitment to excellence is evident in every project we undertake.
High-Quality, In-House Project Execution
What sets us apart is our dedication to in-house project execution. By handling every aspect of your excavation needs internally, we maintain strict quality control and ensure that every detail meets our high standards. This approach allows us to deliver projects on time and within budget, without compromising on quality.
Advanced Equipment
We invest in state-of-the-art equipment to improve the precision and efficiency of our work. Our advanced machinery enables us to tackle even the most challenging excavation tasks with ease. Whether it’s trench excavation for utility lines or rock excavation for new construction, our tools and expertise ensure a job well done.
Over 20 Years of Experience
With more than two decades in the industry, Marchi Paving Inc. has built a reputation for reliability and professionalism. Our extensive experience allows us to understand the unique challenges of each project and develop custom solutions that meet our clients’ needs.
When you choose Marchi Paving Inc. for your excavation services, you’re partnering with a team that’s committed to delivering outstanding results. For more information on how we can assist with your project, visit our Excavation Services page.
We look forward to helping you lay the groundwork for success.
10 Best Practices for Main Drain Repair: Ultimate Guide
Best practices for main drain repair are crucial for ensuring the longevity and functionality of a plumbing system. Here’s a quick hit list of best practices for main drain repair:
- Diagnose the Problem Correctly: Use camera inspections to pinpoint issues.
- Use the Right Tools: Invest in plumber’s snakes and consider hydro-jetting for stubborn clogs.
- Opt for Eco-Friendly Solutions: Use baking soda and vinegar for maintenance.
- Regular Maintenance: Schedule consistent checks to prevent future issues.
- Know When to Call a Pro: Understand the limits of DIY solutions.
- Consider Pipe Relining: For durable long-term fixes.
- Practice Regular Flushing: Use hot water, especially in kitchen sinks.
- Invest in Drain Screens: Reduce blockage from debris.
- Repair Damages Immediately: Avoid escalation of issues.
- Compare Quotes: Ensure a balance between cost and quality.
Maintaining the main drain pipes is essential to prevent damaging backups and costly repairs. These pipes are the unsung heroes of your plumbing system, directing wastewater away from your property. But like anything buried underground, they are prone to wear and tears that can turn from a small annoyance into a big problem if ignored.
Before diving into repair work, safety is your best friend. Ensuring utility lines are marked, wearing the right gear, and getting necessary permits could save money and even lives. Many avoidable mishaps begin with overlooking these crucial steps.
Common issues with main drain systems include blockages from debris or root intrusion, leaks, and corrosion. Tackling these problems promptly and with the knowledge of best practices can save time and hassle later.
Ready to explore these best practices more deeply? Let’s get started!

Terms related to best practices for main drain repair:
– Sewer Repairs
– repair sewer line
– trenchless sewer line repair
Diagnosing Main Drain Problems
Diagnosing the root cause of main drain problems is the first step to effective repair and maintenance. Understanding what’s causing the issue can save you time, money, and a lot of frustration.
Root Cause Identification
The primary culprits for main drain issues often include blockages, root intrusion, and pipe damage. Blockages can arise from debris build-up, grease, or foreign objects. Tree roots are another common cause, as they naturally seek out water sources and can infiltrate pipes, causing clogs or even breaking them.
To accurately identify these problems, a detailed inspection is essential.
Video Inspections
One of the most effective tools for diagnosing drain issues is a drain camera inspection. This involves threading a small camera through your drain system to visually inspect the interior of the pipes. It’s a non-invasive way to pinpoint blockages, cracks, or root intrusions without the need for digging.

Video inspections are often part of the complete drain cleaning solutions offered by professional services. They provide a clear view of the problem and help in planning the appropriate repair strategy.
Professional Services
While some minor issues can be tackled with DIY methods, knowing when to call in the professionals is crucial. Experts have the training and equipment to handle complex problems efficiently. They can perform thorough inspections, provide accurate diagnoses, and recommend the best course of action.
Professional services not only ensure the job is done right but also help avoid potential mistakes that could lead to more expensive repairs down the line. They offer peace of mind, knowing your plumbing system is in good hands.
By understanding the importance of accurate diagnosis, using video inspections, and recognizing when to rely on professional services, you can effectively manage main drain problems. This proactive approach will help maintain the health and functionality of your drainage system, preventing small issues from escalating into costly repairs.
Best Practices for Main Drain Repair
Effectively repairing your main drain can save you both time and money. Here are some best practices for main drain repair that focus on using the right tools, eco-friendly solutions, and regular maintenance.
Tools and Equipment
Having the right tools is crucial for successful drain repair. For minor clogs, a plumber’s snake or auger can be very effective. These tools help break up and remove blockages without damaging the pipes. For more severe blockages, hydro-jetting might be necessary. This technique uses high-pressure water jets to clear stubborn clogs and clean the pipe walls.
If you don’t have access to these tools, consider reaching out to professionals who offer complete drain cleaning solutions. They have advanced equipment and expertise to handle complex issues efficiently.
Eco-Friendly Solutions
Chemical drain cleaners might seem like a quick fix, but they can damage pipes over time and are harmful to the environment. Instead, opt for eco-friendly solutions. A simple mixture of baking soda and vinegar can be an effective and safe way to clear minor blockages. This natural remedy can help maintain your pipes without causing harm to the environment.
Regular use of these solutions can prevent the buildup of debris, reducing the frequency of clogs and prolonging the life of your plumbing system.
Regular Maintenance
Prevention is better than cure. Regular maintenance is key to avoiding major drain issues. Schedule routine cleanings every few months to keep your drains clear and functional. This can include flushing your drains with hot water regularly to prevent buildup, especially in kitchen sinks where grease and food particles often cause blockages.
Investing in a drain screen or catcher can also help prevent debris from entering your drains. These inexpensive devices catch hair, food particles, and other debris, reducing the risk of clogs and saving you money on future repairs.
By following these best practices, you can ensure your main drain remains in top condition, minimizing the risk of costly repairs and maintaining the efficiency of your drainage system.
10 Best Practices for Main Drain Repair
Diagnose the Problem Correctly
The first step in any successful drain repair is diagnosing the problem correctly. Common issues like blockages, root intrusion, or pipe damage can cause significant headaches. Using a drain camera is a smart way to inspect your system. This tool helps you see inside the pipes to pinpoint the exact issue, making it easier to decide on the best repair method.
Use the Right Tools
Having the right tools can make a big difference. For minor clogs, a plumber’s snake is often enough to clear the blockage. For tougher clogs, hydro-jetting might be necessary. This method uses high-pressure water to blast away stubborn debris. If you lack these tools, hiring a professional with the necessary equipment might be the best option.
Clear Blockages with Eco-Friendly Solutions
Avoid using harsh chemical cleaners that can damage pipes and the environment. Instead, try eco-friendly solutions like a mixture of baking soda and vinegar. This natural solution can effectively clear minor clogs without harming your pipes or the planet.
Regular Maintenance to Prevent Future Issues
Regular maintenance is crucial for preventing major problems. Schedule routine cleanings to keep your drains clear. Simple practices, like flushing drains with hot water, can prevent buildup, especially in kitchen sinks where grease can accumulate.
Know When to Call a Professional
Not all drain problems can be fixed with DIY methods. If the blockage persists or if there are signs of structural issues, it’s time to call a professional. Their expertise ensures the problem is handled correctly and safely, saving you from potential mistakes.
Consider Pipe Relining for Long-Term Repairs
For pipes with structural issues, pipe relining is a cost-effective solution. This method involves inserting a new lining inside the existing pipe, offering a seamless repair without extensive digging. It’s a modern solution that provides long-lasting results.
Practice Regular Flushing
One simple yet effective habit is regular flushing with hot water. This practice helps prevent buildup in your pipes, especially in kitchen sinks where food particles and grease can cause blockages.
Invest in a Drain Screen or Catcher
Prevent debris from entering your drains by using a drain screen or catcher. These devices are inexpensive and can save you a lot of money by reducing the risk of clogs.
Repair or Replace Damaged Sections Immediately
Promptly addressing any pipe damage is crucial. Delaying repairs can lead to more severe issues, escalating costs, and inconvenience. Immediate action can prevent further damage and maintain your system’s integrity.
Compare Costs and Get Multiple Quotes
When professional help is needed, don’t settle on the first quote. Compare costs and get multiple quotes to ensure you receive competitive rates and quality service. This approach helps you make an informed decision and ensures you get the best value for your money.
Safety Measures During Repairs
When it comes to main drain repair, safety is not just a priority—it’s a necessity. Here’s how to ensure a safe repair process every step of the way.
Utility Line Identification
Before you start digging, identify any utility lines that might be in the area. Contact local utility companies to mark the locations of gas, water, and electrical lines. This step is crucial to prevent dangerous accidents and avoid hefty fines.
Tip: In many areas, calling 8-1-1 will connect you to a free service that marks utility lines for you.
Permits and Permissions
Don’t forget to secure the necessary permits and permissions before beginning any excavation work. Local authorities typically require permits to ensure that all work complies with regulations and safety standards. Skipping this step can lead to legal troubles and project delays.
Protective Gear
Wearing the right protective gear is vital to ensure your safety during repairs. Essential items include:
- Hard hats to protect against head injuries
- High-visibility clothing to ensure you’re seen by others on-site
- Safety gloves to protect your hands from sharp objects and chemicals
- Steel-toed boots to guard against foot injuries
These items help protect you from common on-site hazards, making the repair process safer and more efficient.
By following these safety measures during repairs, you can minimize risks and ensure a smooth and secure repair process. Up next, we’ll dive into some frequently asked questions about main drain repair to further guide you through the process.
Frequently Asked Questions about Main Drain Repair
What is the best way to fix a clogged main drain?
Fixing a clogged main drain efficiently often involves trenchless repairs. This method is less invasive and can save time and money compared to traditional digging. Techniques like hydro-jetting, which uses high-pressure water to clear stubborn clogs, are highly effective. Hydro-jetting not only removes the blockage but also cleans the pipe walls, preventing future issues.
 or main drain repair infographic 4_facts_emoji_light-gradient
For minor clogs, a plumber’s snake or auger can be a quick and cost-effective solution. However, if the problem persists or involves pipe damage, it’s best to consult a professional.
How to maintain the main sewer line?
Regular maintenance is key to keeping your main sewer line in top condition. Here are a few best practices:
- Limit Food Waste: Avoid disposing of grease, oils, or large food particles down the drain. These can cause blockages over time.
- Regular Cleaning: Schedule routine cleanings to prevent buildup. Using eco-friendly solutions like a mix of baking soda and vinegar can keep your pipes clear without causing damage.
- Preventive Measures: Installing a drain screen or catcher helps prevent debris from entering the system.
These steps can help extend the life of your sewer line and reduce the likelihood of costly repairs.
What are the cons of trenchless sewer repair?
While trenchless sewer repair is a popular choice due to its minimal disruption, it does have some limitations.
- Potential Limitations: Trenchless methods may not be suitable for severely damaged pipes or those with extensive root intrusion. In such cases, traditional repair methods might be necessary.
- Rare Severe Damage: In rare instances, if a pipe is too damaged or misaligned, trenchless options may not be effective.
Despite these limitations, trenchless repairs are generally a reliable and efficient choice for most situations. They offer a long-lasting solution with a lifespan of up to 50 years, making them a cost-effective investment for homeowners.
By understanding these frequently asked questions about main drain repair, you can make informed decisions and ensure your plumbing system remains efficient. Up next, we’ll explore more about maintaining your main sewer line to prevent future issues.
Conclusion
At Marchi Paving Inc., we understand that high-quality execution is vital for successful main drain repair. With over 20 years of experience, we have honed our skills and perfected our methods to ensure that every project we undertake meets the highest standards. Our commitment to excellence ensures that your plumbing system remains efficient and durable for years to come.
We use advanced equipment to improve our efficiency and precision. This enables us to provide top-notch service while minimizing disruption to your property. Whether it’s using state-of-the-art video inspection tools to diagnose issues accurately or employing trenchless technology for seamless repairs, our approach is both innovative and effective.
By choosing us, you’re not just hiring a contractor; you’re partnering with a team dedicated to delivering outstanding results. We tailor our services to meet your specific needs, ensuring that your main drain repair is handled with care and expertise.
Ready to experience the Marchi Paving difference? Contact us today to discuss your main drain repair needs and see how our advanced equipment and skilled team can provide you with the best solutions. Let us help you maintain a reliable and efficient plumbing system.
Hardscape Pavers: Top 5 Stunning Choices for 2025
Embracing Hardscape Pavers for Sustainable Development
Hardscape pavers are more than just a stylish addition to your outdoor spaces—they’re a key player in sustainable development. As cities and properties evolve, integrating eco-friendly practices becomes crucial for long-term sustainability and safety. Here’s how hardscape pavers make a difference:
- Modernize Development: Pavers offer innovative solutions that reduce the environmental impact of urban expansion, providing attractive and functional surfaces that blend seamlessly with nature.
- Sustainability: With their permeability, pavers allow rainwater to naturally soak back into the ground, minimizing runoff and aiding in groundwater replenishment.
- Eco-Friendly Practices: Many pavers are made from natural materials, reducing carbon footprints, and fostering greener, healthier environments.
Incorporating pavers into your landscape align with the broader goals of modern development. They ensure that the growth of our cities and suburbs occurs responsibly, safeguarding both the environment and community well-being.
For property managers and homeowners in Middlesex County, MA, the adaptation of hardscape pavers means more than just beautifying spaces. It ensures projects are completed efficiently and eco-consciously, keeping properties accessible and safe.
In summary, choosing hardscape pavers for your next project is a step towards a more sustainable future.

Basic hardscape pavers glossary:
– hardscape design
– hardscape construction
– hardscape maintenance service
Understanding Hardscape Pavers
When it comes to changing outdoor spaces, hardscape pavers are a versatile and stylish choice. They offer a range of benefits, from durability to aesthetic appeal, making them a popular option for homeowners and property managers alike. Let’s explore the different aspects of hardscape pavers and see how they stack up against traditional paving options.
Hardscape vs. Traditional Paving
Traditional paving often involves large, continuous surfaces like concrete or asphalt. While these materials have their benefits, they can lead to issues such as cracking and water runoff. Hardscape pavers, on the other hand, consist of individual units that interlock to form a cohesive surface. This design allows for flexibility and movement, reducing the likelihood of cracking over time. Plus, the gaps between pavers enable water to seep into the ground, helping manage stormwater more effectively and reducing erosion.
Interlocking Concrete Pavers
Interlocking concrete pavers are a popular choice for driveways, patios, and walkways. These pavers are designed to fit together like pieces of a puzzle, creating a strong and stable surface. Their durability makes them ideal for high-traffic areas, and they come in a variety of shapes, sizes, and colors, allowing for creative and customizable designs. The interlocking feature not only improves the aesthetic appeal but also contributes to the structural integrity of the surface.
Outdoor Porcelain Tiles
For those seeking a sleek and modern look, outdoor porcelain tiles are an excellent option. These tiles are known for their strength and resistance to stains, making them a low-maintenance choice for outdoor spaces. Porcelain tiles have a non-porous surface, which means they won’t absorb water, making them an ideal choice for pool decks or areas prone to moisture. Their neat appearance can lift the look of any outdoor area, providing a luxurious feel without the hefty maintenance requirements.
Incorporating hardscape pavers into your outdoor projects offers a blend of functionality and beauty. Whether you’re looking to create a durable driveway with interlocking concrete or a chic patio with porcelain tiles, the options are vast and adaptable to your unique needs.
For those in Middlesex County, MA, Marchi Paving Inc. offers a range of hardscape solutions custom to improve and protect your property.
Benefits of Hardscape Pavers
When it comes to enhancing your outdoor spaces, hardscape pavers offer a trifecta of benefits: aesthetic appeal, flexible design, and easy installation. Here’s how these advantages make them a top choice for homeowners.
Aesthetic and Function
Hardscape pavers aren’t just about looks; they’re about creating functional beauty. Whether you’re aiming for a rustic charm or a modern vibe, pavers come in various colors, shapes, and textures to match your vision. Imagine a patio that not only looks stunning but also withstands daily wear and tear. With pavers, you get the best of both worlds—visual appeal and durability. They are designed to handle heavy foot traffic and resist cracking, ensuring your outdoor space remains pristine for years.
Flexible Design
The versatility of hardscape pavers is best. From intricate patterns to simple layouts, the design possibilities are endless. You can mix and match different styles to create a unique look that complements your home’s architecture. Need a winding garden path or a sleek driveway? Pavers offer the flexibility to shape your space exactly how you envision it. This adaptability makes them ideal for any project, big or small.
Easy Installation
One of the standout features of hardscape pavers is their straightforward installation process. Unlike traditional paving that requires extensive groundwork, pavers can be laid with minimal disruption. This means less time waiting for your project to be completed and more time enjoying your new outdoor area. Plus, if a paver gets damaged, it can be easily replaced without disturbing the surrounding area, making maintenance a breeze.

Incorporating hardscape pavers into your design not only lifts the look of your outdoor spaces but also provides practical benefits that improve your property’s functionality. Whether you’re reimagining your garden path or upgrading your driveway, pavers are a smart, stylish choice.
Types of Hardscape Pavers
When selecting hardscape pavers for your outdoor space, understand the variety of materials available. Each type offers unique benefits and aesthetics, allowing you to tailor your design to your specific needs and preferences.
Pea Gravel
Pea gravel is a cost-effective option for those looking to add texture and a natural look to their landscape. These small, smooth stones are perfect for walkways, patios, and driveways. Their rounded edges make them comfortable to walk on, and they come in a range of colors, from earthy browns to soft grays. Pea gravel is also excellent for drainage, making it a sustainable choice.
River Rocks
For a more polished appearance, river rocks are a great choice. These larger, smooth stones offer a natural elegance and are often used in garden beds, around water features, or as accents in pathways. Their size and weight make them stable, and they can help prevent soil erosion. River rocks come in various shades, providing versatility in design.
Crushed Concrete
An eco-friendly choice, crushed concrete is made from recycled materials, reducing construction waste. It’s an excellent option for driveways and pathways, offering durability and a rustic charm. Crushed concrete compacts well, providing a stable surface, and its rough texture adds an industrial edge to any landscape design.
Lava Rock
For those seeking a dramatic flair, lava rock is a striking option. Known for its bold red and black hues, lava rock is lightweight yet durable. It’s often used in garden beds or as a mulch alternative, helping to retain soil moisture. Lava rock’s unique appearance can serve as a focal point in any outdoor space, adding both color and texture.
Slate
Slate pavers bring a touch of sophistication to any outdoor area. With their rich, natural tones and smooth surfaces, slate is perfect for patios, walkways, and pool decks. This material is known for its durability and slip-resistant properties, making it a safe and stylish choice. Slate’s natural variation in color and texture ensures each installation is one-of-a-kind.
Choosing the right type of hardscape pavers depends on your aesthetic goals and functional needs. Whether you prefer the rustic appeal of crushed concrete or the elegance of slate, there’s a paver option that will improve your landscape beautifully.
Installation and Maintenance Tips
Proper installation and maintenance are key to ensuring your hardscape pavers stay beautiful and functional for years. Let’s explore some essential tips to keep your pavers in top shape.
Pressure Washing
Pressure washing is an effective way to clean your pavers. It removes dirt, mold, and mildew, restoring the original look of your surfaces. However, it’s crucial to use the correct pressure settings. Too much pressure can damage the pavers, especially those made from softer materials like slate. Always consider hiring a professional to ensure the right technique is used.
Proper Installation
Installing hardscape pavers correctly the first time can save you a lot of hassle in the long run. Here are some steps to follow:
- Preparation: Start with a clean, level base. Remove any debris and compact the soil to prevent settling.
- Base Layer: Lay a solid foundation with a layer of crushed stone or gravel, compacted to provide stability.
- Sand Layer: Spread a layer of sand over the base. This helps level the pavers and provides a cushion.
- Laying Pavers: Place the pavers in your desired pattern, ensuring they fit snugly together. Use spacers to maintain even gaps.
- Edge Restraints: Install edge restraints to keep the pavers in place and prevent shifting.
- Finishing Touches: Fill the gaps between pavers with sand and compact the surface to lock everything in place.
Maintenance Practices
To keep your hardscape pavers looking their best, regular maintenance is essential. Here are some easy practices to follow:
- Regular Cleaning: Sweep your pavers regularly to remove dirt and debris. This prevents stains and keeps them looking fresh.
- Sealant Application: Applying a sealant can protect your pavers from stains and weather damage. Consider resealing every few years, especially in high-traffic areas.
- Weed Control: Keep an eye out for weeds growing between pavers. Regularly remove them and consider using a weed barrier or herbicide to prevent growth.
- Repair Cracks: Address any cracks or damage promptly. This prevents further deterioration and maintains the integrity of your hardscape.
By following these installation and maintenance tips, your hardscape pavers will remain a stunning and durable feature of your outdoor space. Up next, we’ll tackle some frequently asked questions about hardscape pavers to clear up any lingering queries.
Frequently Asked Questions about Hardscape Pavers
What is the least expensive hardscape?
When it comes to budget-friendly options, pea gravel, river rocks, and crushed concrete are your best bets. These materials offer cost-effective solutions for creating beautiful outdoor spaces without breaking the bank.
- Pea Gravel: This small, rounded stone is one of the most affordable hardscape materials. It’s easy to install and provides excellent drainage, making it ideal for pathways and driveways.
- River Rocks: Slightly larger than pea gravel, river rocks offer a natural look and are perfect for garden beds and water features. They are also relatively inexpensive and require minimal maintenance.
- Crushed Concrete: Recycled from demolished structures, crushed concrete is both eco-friendly and economical. It’s a great choice for driveways and large areas where cost savings are a priority.
Are pavers cheaper than concrete?
The cost comparison between pavers and poured concrete can vary based on several factors, including materials and labor.
- Materials: Pavers often come in a wide range of styles and materials, which can affect the overall cost. While basic concrete pavers can be comparable to poured concrete, high-end pavers can be more expensive.
- Labor: Installation labor for pavers can be higher due to the need for precise placement and fitting. However, pavers offer flexibility in design and repair, which can reduce long-term maintenance costs.
The choice between pavers and concrete will depend on your budget, design preferences, and the specific needs of your project.
Should you pressure wash pavers?
Pressure washing is a popular method for cleaning hardscape pavers, but it’s important to proceed with caution.
- Cleaning Methods: Pressure washing can effectively remove dirt, grime, and stains, restoring the appearance of your pavers. However, using too much pressure can potentially damage the surface, especially with softer materials like slate.
- Potential Damage: To avoid damage, use a lower pressure setting and a wide spray nozzle. It’s often best to hire a professional who can ensure the correct technique is applied.
Regular cleaning, along with proper maintenance, will keep your hardscape pavers looking their best for years to come. Next, we’ll wrap up our discussion with a look at Marchi Paving Inc.’s commitment to quality and innovation.
Conclusion
At Marchi Paving Inc., our commitment to high-quality execution is best. With over 20 years of experience in hardscaping and paving, we ensure every project is completed to the highest standards. Our team uses only the best materials and advanced equipment to deliver durable, aesthetically pleasing results. Whether you’re planning a new driveway, patio, or garden path, our hardscape pavers are designed to improve your outdoor spaces.
Advanced Equipment for Precision and Efficiency
We believe that the right tools make all the difference. That’s why we invest in state-of-the-art machinery that allows us to work efficiently and precisely. This means your project will be completed on schedule and within budget, without compromising on quality. Our equipment ensures a smooth, even surface that not only looks great but stands the test of time.
Dedication to Excellence
Our in-house team of skilled professionals handles every aspect of your project. This approach allows us to maintain strict quality control and ensure that every detail meets our high standards. From design to installation, we work closely with you to bring your vision to life.
Experience the Marchi Paving Difference
Choosing Marchi Paving Inc. means partnering with a team that is dedicated to delivering outstanding results. Our focus on quality and customer satisfaction sets us apart in the industry. Ready to start your project? Contact us today to experience the Marchi Paving difference.
Retaining Wall Calculator: Top 3 Essential Tips 2025
A retaining wall calculator is a handy tool that could save you time and effort when planning your next wall project. It helps to streamline the process by calculating the number of blocks, the amount of gravel needed for backfill, and even the costs involved. Instead of struggling with complex mathematical equations, this calculator crunches the numbers for you. This means more time focusing on aesthetics and function, and less time scribbling figures on paper.
- Purpose: It assists in effective planning and material estimation for retaining walls.
- Benefits: Quick and precise calculations for blocks, gravel, and costs, preventing unnecessary spending.
- How it Works: Enter the wall’s dimensions and block details; get instant results.
This tool is your partner in efficient landscaping: be it a small garden makeover or a large-scale commercial project. Whether you’re a DIY enthusiast or a seasoned property manager, understanding the material requirements and costs upfront minimizes surprises.
Here’s an inspiring example: In Houston, a beautifully crafted retaining wall not only addressed soil erosion but also improved a garden’s appeal. By accurately anticipating materials and costs, unexpected problems were avoided, leading to timely project completion.
A retaining wall is more than just support; it’s a landscape statement.

Understanding Retaining Wall Calculators
Retaining wall calculators are invaluable tools that simplify the process of planning and building retaining walls. They help you determine the exact materials needed, from blocks to gravel, and provide cost estimates, saving you both time and money.
Types of Retaining Wall Calculators
There are various types of retaining wall calculators available, each designed to cater to specific needs:
- Basic Calculators: Focus on calculating the number of blocks required based on wall dimensions.
- Advanced Calculators: Include features for estimating gravel for backfill, costs, and even drainage needs.
Materials Used in Retaining Walls
Retaining walls can be made from various materials, each offering unique benefits:
- Concrete Blocks: Durable and versatile, ideal for a range of designs.
- Natural Stone: Offers a rustic and aesthetic appeal, perfect for garden landscapes.
- Brick: Provides a classic look, often used for decorative purposes.
- Wood: A cost-effective option, though less durable than stone or concrete.
Purpose of Using a Retaining Wall Calculator
The primary purpose of a retaining wall calculator is to streamline the planning and estimation process. It helps you:
- Calculate Materials: Determine the number of blocks and amount of gravel needed.
- Estimate Costs: Get a clear idea of the financial investment required.
- Plan Efficiently: Avoid over-purchasing or underestimating materials, reducing waste and unexpected expenses.
Benefits of Retaining Wall Calculators
Using a retaining wall calculator comes with several advantages:
- Accuracy: Provides precise measurements and estimates, reducing errors.
- Time-Saving: Eliminates the need for manual calculations, speeding up the planning process.
- Cost-Effective: Helps prevent unnecessary spending by accurately predicting material needs.
By leveraging these calculators, you can ensure that your retaining wall project is both efficient and economical. Whether you’re managing a large commercial project or enhancing your home garden, a retaining wall calculator is an essential tool for success.
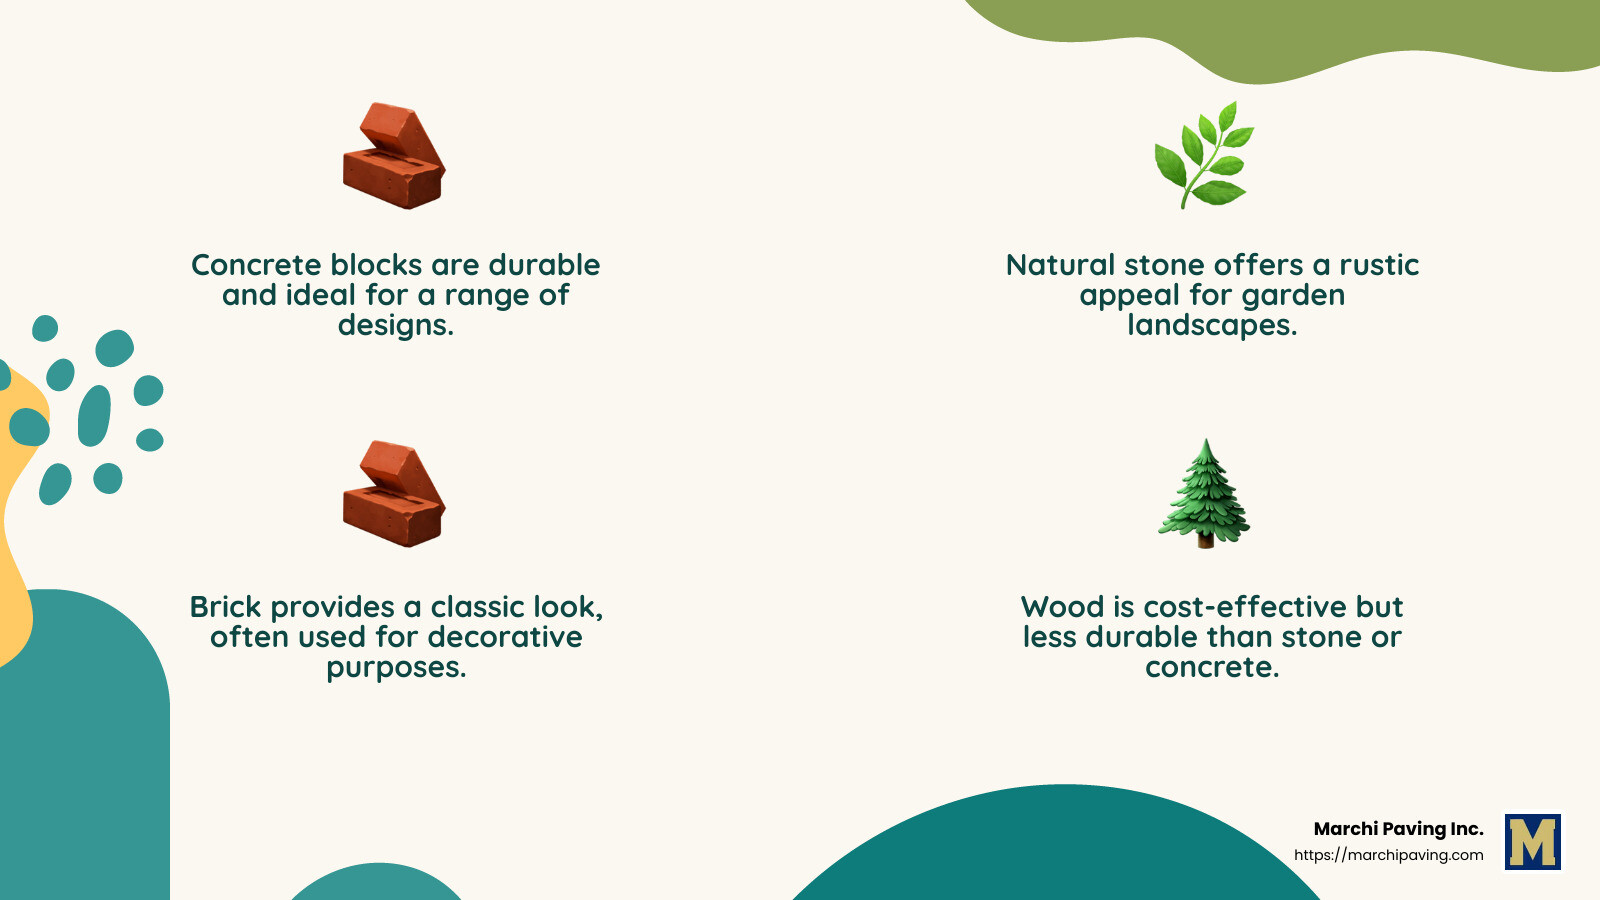
In the next section, we’ll dig into how to calculate retaining wall materials, including measurements, formulas, and more.
How to Calculate Retaining Wall Materials
Calculating the materials for your retaining wall is a crucial step in ensuring you have everything you need for a smooth and efficient build. Here’s a step-by-step guide to help you accurately estimate the materials required.
Step-by-Step Guide
1. Measure Your Wall
Start by measuring the wall width and wall height. These measurements will help you determine how many blocks you need. The first row of blocks should be embedded below ground level by about 10% of the wall height for stability.
2. Determine Block Dimensions
Next, know the block width and block height. These dimensions are important for calculating the number of rows and columns.
3. Calculate Rows and Columns
- Rows: Divide the wall height by the block height and round up to the nearest whole number.
- Columns: Divide the wall width by the block width and round up.
For example, if your wall is 3 feet high and 30 feet long using blocks that are 6 inches high and 10 inches wide, you will need 6 rows and 36 columns.
4. Calculate Total Blocks
Multiply the number of rows by the number of columns to get the total number of blocks needed. If you’re using a cap row, remember to subtract one row from your calculation.
5. Include Cap Blocks
If your wall design includes a cap row, calculate the number of cap blocks. This is usually equal to the number of columns, provided the cap blocks have the same width as the regular blocks.
Estimating Base and Backfill Gravel
1. Base Gravel
The base of your wall needs a solid foundation. Calculate the volume of base gravel needed by measuring the length, width, and desired depth of the gravel layer. Compacted gravel provides stability and prevents shifting.
2. Backfill Gravel
Backfill gravel is essential for drainage and stability. Calculate the volume by multiplying the wall height, length, and width of the backfill area. Use compacted gravel to ensure proper support.
3. Use Landscape Fabric
Consider using landscape fabric between the soil and backfill gravel. This helps prevent soil from mixing with the gravel, maintaining drainage efficiency.
By following these steps, you can accurately calculate the materials needed for your retaining wall. This ensures you have the right amount of blocks, base gravel, and backfill gravel, helping you avoid unnecessary expenses and delays.
In the next section, we’ll explore how to use a retaining wall calculator for inputting dimensions, selecting block styles, and more.
Using the Retaining Wall Calculator
Example Calculation
Using a retaining wall calculator can simplify your project planning. Let’s walk through an example to show how it works.
1. Input Dimensions
Start by entering the dimensions of your retaining wall. For example, if your wall is 3 feet high and 30 feet long, input these values into the calculator.
2. Select Block Style
Choose the style of block you plan to use. Whether you’re opting for a traditional concrete block or a more decorative stone, the calculator will adjust the calculations accordingly.
3. Decide on a Cap Row
Consider if you want a cap row, which is the topmost decorative layer. If yes, select this option. It adds a finished look and can affect the total block count.
4. Enter Price Per Block
Input the cost per block. This helps the calculator estimate the total cost of materials. For example, if each block costs $5, enter this value.
5. Choose Grouped Patterns
Decide if you want grouped patterns, such as a dry stack wall (blocks stacked without mortar) or a mortared wall (blocks secured with mortar). This choice can impact cost and stability.
Example Project
Imagine building a garden wall. You’ve input the wall dimensions, chosen a decorative block style, and opted for a cap row. You’ve also selected a dry stack pattern for a rustic look.
Calculation Process
- Rows and Columns: The calculator divides the wall height by the block height and the wall length by the block width to determine the number of rows and columns.
- Total Blocks: It multiplies rows by columns to find the total blocks needed.
- Cap Blocks: If a cap row is selected, the calculator adds these to the total.
Results
The calculator provides a detailed breakdown:
- Total Blocks Required: 180 blocks
- Cap Blocks: 30 blocks
- Estimated Cost: Based on the price per block, the calculator gives a total cost estimate.
Using the retaining wall calculator streamlines the planning process, ensuring you have a clear understanding of the materials and costs involved. In the next section, we’ll share some tips for accurate estimation to help you avoid common pitfalls.
Tips for Accurate Estimation
When planning a retaining wall project, accuracy is key. Here are some important tips to ensure your calculations are spot on.
Extra Materials
Always order extra materials. It’s common to have some waste or bad material, so having a surplus is smart. A good rule of thumb is to order about 10% more than your calculated needs. This ensures you have enough blocks even if some are damaged or miscalculated.
Waste and Bad Material
Consider potential waste and bad material during installation. Blocks can break or be defective. By accounting for this, you can avoid delays. It’s better to have a little extra than to run short mid-project.
Embedding Blocks
For stability, embed the first row of blocks below ground level. This provides a strong base and prevents shifting. Typically, embedding about 10% of the wall’s height is advisable. For a 3-foot wall, this means burying around 3 to 4 inches.
Height Adjustments
Adjust the wall height for local conditions. If your area experiences heavy rainfall, consider increasing the wall height slightly to manage water flow. This can prevent overflow and erosion.
Structural Limits
Understand your wall’s structural limits. Each block type has a maximum height it can support without reinforcement. For higher walls, consult with a professional to determine if additional support, like reinforcements or a cantilever design, is needed.
By following these tips, you’ll ensure a more accurate and efficient retaining wall project. These precautions can save you time, money, and headaches down the road. Up next, we’ll tackle some frequently asked questions about retaining wall calculators to further assist your planning.
Frequently Asked Questions about Retaining Wall Calculators
How do I calculate how much retaining wall I need?
Calculating the amount of retaining wall you need involves a few key measurements. Start with the wall length and height. These will determine the face area of your wall. Multiply the length by the height to get the total square footage. This is the area that your retaining wall will cover.
For example, if your wall is 20 feet long and 3 feet high, the face area will be:
[ \text{Face Area} = \text{Wall Length} \times \text{Wall Height} = 20 \, \text{ft} \times 3 \, \text{ft} = 60 \, \text{sq ft} ]
This face area helps you figure out how many blocks you’ll need.
What is the formula for calculating a retaining wall?
To calculate the number of blocks needed, you must know the height and length of both the wall and the blocks you plan to use. Here’s a simple formula to estimate:
[ \text{Total Bricks} = \frac{\text{Wall Surface Area}}{\text{Block Surface Area}} ]
First, find the surface area of the wall using its height and length. Then, calculate the brick area by multiplying the block’s height by its length. Divide the wall’s surface area by the brick area to find the total number of bricks needed.
For example, if your wall’s surface area is 60 sq ft, and each block covers 1 sq ft, you’ll need approximately 60 blocks.
How thick should a 3-foot retaining wall be?
The thickness of a retaining wall depends on its height and the materials used. For a 3-foot wall, the base thickness should be about one-eighth of the wall height. This means a base thickness of around 4.5 inches. The stem thickness (or the main part of the wall) should also be considered. Typically, it should be at least 6 to 12 inches for stability.
These are general guidelines. Local soil conditions and wall design may require adjustments. For walls over 3 feet, or if you’re unsure, it’s best to consult a professional for specific recommendations.
Next, we’ll dive into how to use the retaining wall calculator effectively to simplify your planning process.
Conclusion
In conclusion, using a retaining wall calculator can significantly streamline your project planning. This tool helps you determine the precise amount of materials needed, saving time and reducing waste. By inputting your wall dimensions and block specifications, you can quickly calculate the number of blocks and other materials required. This accuracy ensures your project stays on budget and schedule.
At Marchi Paving Inc., we understand the importance of accurate estimations. Our expertise in hardscaping and retaining wall installations ensures that your project is executed with precision and care. With over 20 years of experience, we pride ourselves on delivering high-quality results using advanced equipment and techniques.
For those in the Chelmsford, MA area and beyond, our team is ready to assist with your retaining wall needs. Whether you’re planning a DIY project or seeking professional installation, we’re here to help you achieve your vision with confidence.
Explore our hardscaping services to learn more about how we can support your next project. Let Marchi Paving Inc. be your trusted partner in creating durable and beautiful retaining walls.